
Crispy Rice: 7 Easy Ways to Make It Perfectly Crunchy
Table of Contents
Tired of mushy, soggy rice that sticks to the pan or falls apart when you try to crisp it? Whether you’re craving those golden, crunchy rice cakes from your favorite sushi restaurant or want to transform leftover rice into something extraordinary, perfectly crispy rice is the answer. Imagine biting into rice with a shatteringly crisp exterior that gives way to a tender, fluffy interior—it’s absolutely achievable at home.
After 15 years of experimenting with Asian cooking techniques in both professional kitchens and my home, I’ve mastered every method for creating restaurant-quality crispy rice. From traditional stovetop techniques to modern air fryer shortcuts, I’ve tested them all to bring you foolproof results every time.
In this comprehensive guide, you’ll discover 7 easy ways to make crispy rice perfectly crunchy, essential rice selection and prep tips, expert cooking techniques for each method, creative topping ideas including spicy shrimp salad, and answers to every question about achieving that coveted golden crust.
Why These Crispy Rice Methods Work
These crispy rice techniques deliver consistently crunchy, golden results because they focus on practicality and foolproof execution:
- Uses any type of rice you have – Day-old leftover rice, freshly cooked rice, or even frozen rice work perfectly with proper preparation
- Ready in 10-20 minutes – Quick cooking methods mean you can create restaurant-quality crispy rice for weeknight dinners
- Perfect for any meal – Serve as a base for protein bowls, appetizers, side dishes, or even breakfast with toppings
- Minimal ingredients required – Just rice, oil, and seasoning create incredible texture and flavor
- Works with various cooking methods – Choose stovetop, oven, air fryer, or griddle based on your equipment and preferences
Choosing the Right Rice for Crispy Rice
The type of rice you start with significantly impacts your final crispy rice results. Understanding which varieties work best helps you achieve perfect texture every time.
Best Rice Types for This Recipe
Short-grain rice (like sushi rice or Calrose) is ideal for crispy rice because it contains more starch, which helps the grains stick together and form cohesive cakes that crisp beautifully. The higher starch content creates better browning and a satisfying crunch.
Medium-grain rice (jasmine or standard white rice) works excellently and is what most people have in their pantry. It crisps well while maintaining enough structure to hold together.
Day-old refrigerated rice is actually superior to freshly cooked rice for making crispy rice because the cooling process allows moisture to evaporate and starches to crystallize, preventing mushiness when crisping. The drier surface browns faster and more evenly.
Long-grain rice (like basmati) can work but tends to separate more easily and won’t form as cohesive cakes. It’s better for loose crispy rice bits rather than formed patties.
Buying and Storing Tips
Purchase standard white rice, sushi rice, or jasmine rice from any grocery store—no specialty varieties needed. Look for rice with a production date rather than just an expiration date to ensure freshness.
Store uncooked rice in an airtight container in a cool, dry place for up to 2 years. Cooked rice should be cooled quickly, refrigerated within 2 hours, and used within 3-4 days for best crispy rice results.
For intentional crispy rice preparation, cook rice 1-2 days ahead and refrigerate uncovered for a few hours to dry out the surface. This creates optimal crisping conditions.
Rice Substitutions and Alternatives
Swap white rice for brown rice, though it requires slightly longer cooking time to crisp and has a chewier texture. Cauliflower rice can be used for low-carb crispy rice but won’t achieve the same texture—press out excess moisture thoroughly first.
Forbidden black rice or red rice create visually stunning crispy rice with nutty flavor, though they take longer to crisp due to higher fiber content. Leftover rice pilaf or fried rice works wonderfully—the existing seasonings add extra flavor to your crispy rice.
Ingredients & Prep
Rice Prep Essentials
For basic crispy rice (serves 4):
- 3 cups cooked rice (preferably day-old and refrigerated)
- 2-3 tablespoons neutral oil (vegetable, canola, or avocado)
- Salt to taste
- Optional: sesame oil (1 teaspoon for flavor)
Critical preparation step: If using freshly cooked rice, spread it on a baking sheet and refrigerate uncovered for at least 2 hours or overnight. This dries the surface and prevents mushiness. Break up any large clumps with your hands so individual grains can crisp.
The moisture secret: Pat rice with paper towels before cooking to remove excess moisture. Wet rice steams instead of crisps, creating soggy results instead of that golden crunch you’re after.
Seasoning and Flavor Options
Basic seasoning (mix into rice before crisping):
- 1 teaspoon salt
- ½ teaspoon garlic powder
- ½ teaspoon onion powder
- ¼ teaspoon white pepper
Asian-inspired seasoning:
- 1 tablespoon soy sauce or tamari
- 1 teaspoon sesame oil
- ½ teaspoon rice vinegar
- Pinch of sugar
Spicy variation:
- ½ teaspoon chili flakes
- ¼ teaspoon cayenne pepper
- 1 teaspoon gochugaru (Korean chili flakes)
Essential Pantry Staples
High-heat cooking oil is crucial for crispy rice. Avocado oil (smoke point 520°F), grapeseed oil (420°F), or refined coconut oil (400°F) work best. Avoid olive oil or butter alone as they burn at the high temperatures needed for proper crisping.
Have sesame seeds, furikake seasoning, or nori strips ready for garnishing. Soy sauce, rice vinegar, and chili oil make excellent finishing touches that add flavor without compromising crispness.
Step-by-Step Cooking Instructions: 7 Methods
Method 1: Stovetop Pan-Frying (Classic Technique)
Pre-cooking prep: Heat a large non-stick or well-seasoned cast-iron skillet over medium-high heat for 2-3 minutes. Add 2 tablespoons oil and swirl to coat.
Cooking method: Press 3 cups of prepared rice into the pan in an even layer about ½-inch thick. Don’t stir or move it—this is critical. Cook undisturbed for 5-7 minutes until the bottom forms a deep golden crust. You’ll hear crackling sounds and smell toasted rice.
Flipping technique: Slide a wide spatula under sections and flip in large pieces, or invert the entire rice cake onto a plate and slide it back into the pan. Cook the second side for 4-5 minutes until equally crispy.
Doneness check: The crispy rice should be deep golden brown with a crackling crust when you press it gently. Break off a piece—it should crunch audibly.
Method 2: Oven-Baked Crispy Rice
Pre-cooking prep: Preheat oven to 425°F. Line a baking sheet with parchment paper and brush generously with 2 tablespoons oil.
Cooking method: Spread rice in an even, thin layer (about ¼-inch thick) on the prepared sheet. Drizzle another tablespoon of oil over the top and use your hands to press rice firmly into a compact layer.
Bake for 20-25 minutes without stirring. At 15 minutes, check for browning around edges. Continue baking until deeply golden and crispy throughout.
Advantage: Hands-off method that crisps large batches evenly. Perfect for making crispy rice cakes to top with proteins or vegetables.
Method 3: Air Fryer Crispy Rice
Pre-cooking prep: Preheat air fryer to 400°F for 3 minutes. Lightly spray the basket with oil or line with perforated parchment.
Cooking method: Form rice into ½-inch thick patties or spread loosely in the basket. Spray tops lightly with oil. Air fry for 10-12 minutes, shaking the basket halfway through for loose crispy rice, or leaving undisturbed for formed cakes.
Advantage: Fastest method using minimal oil. Creates extra-crunchy texture with less effort.
Method 4: Cast-Iron Skillet Method (Restaurant-Style)
Pre-cooking prep: Heat a cast-iron skillet over medium-high heat until water droplets sizzle immediately upon contact. Add 3 tablespoons oil.
Cooking method: Form rice into a ¾-inch thick cake directly in the hot oil. Press down firmly with a spatula. Place another heavy pan on top to compress the rice and create even contact with the hot surface.
Cook for 6-8 minutes per side without peeking. The weight creates uniform browning and extra-crispy texture. This mimics the technique used in high-end restaurants.
Method 5: Griddle or Plancha Method
Pre-cooking prep: Heat an electric griddle or flat-top to 375-400°F. Oil the surface generously.
Cooking method: Spread rice in thin circles or rectangles directly on the griddle. Press with a spatula to flatten. Cook for 4-5 minutes per side until crispy and golden.
Advantage: Cook multiple servings simultaneously. Perfect for meal prep or feeding a crowd. Excellent temperature control prevents burning.
Method 6: Waffle Iron Crispy Rice
Pre-cooking prep: Preheat waffle iron to medium-high. Brush both plates generously with oil.
Cooking method: Place ½ cup rice on the center of the iron and close the lid. Cook for 5-7 minutes until golden and crispy. Don’t open early or rice will stick.
Advantage: Creates fun, textured crispy rice “waffles” with extra surface area for toppings. Kids love this presentation.
Method 7: Deep-Frying for Extra Crispy Rice Cakes
Pre-cooking prep: Form cold rice into 2-3 inch patties, ½-inch thick. Refrigerate for 30 minutes to firm up. Heat 2 inches of oil to 350°F in a heavy pot.
Cooking method: Carefully lower rice patties into hot oil using a slotted spoon. Fry for 3-4 minutes per side until deeply golden and puffed slightly.
Drain on paper towels and season immediately with salt while hot.
Advantage: Creates the crunchiest, most dramatic texture similar to Asian rice crackers. Best for special occasions or appetizers.
Pro Tips for Perfect Crispy Rice
Avoiding Soggy or Burnt Results
The biggest mistake is using freshly cooked, hot rice. Always use cooled, day-old rice or at minimum, refrigerate fresh rice for 2+ hours. Warm rice contains too much moisture and steams instead of crisps.
Don’t move the rice while cooking. Resist the urge to stir, flip early, or check constantly. Crispy rice needs uninterrupted contact with the hot surface to develop that golden crust. Set a timer and trust the process.
Control your heat carefully. Medium-high heat (around 375-400°F) creates the perfect balance—hot enough to crisp quickly but not so hot that the outside burns before the inside heats through.
Use enough oil but not too much. The oil should coat the pan and rice surface but not create a deep layer. Too little oil causes sticking and uneven browning; too much makes greasy rather than crispy rice.
Tool Recommendations for Best Results
A heavy cast-iron skillet distributes heat evenly and retains temperature when rice is added, creating superior browning. A fish spatula with thin, flexible edges slides under crispy rice without breaking it apart.
An instant-read thermometer helps monitor oil temperature for deep-frying method (maintain 350°F). A splatter screen prevents oil spray mess during stovetop cooking while allowing moisture to escape.
For formed crispy rice cakes, ring molds or English muffin rings create perfect circles with uniform thickness. Press rice into molds, then cook directly in the pan for restaurant-quality presentation.
Storage and Reheating
Refrigerate: Cool crispy rice completely on a wire rack (maintains crispness on bottom), then store in an airtight container with paper towels to absorb moisture for up to 3 days. Reheat in a 400°F oven for 5-7 minutes to restore crunch.
Freeze: Flash-freeze crispy rice cakes on a baking sheet for 1 hour, then transfer to freezer bags separated by parchment paper. Freeze up to 2 months. Reheat from frozen in a 425°F oven for 10-12 minutes.
Never microwave crispy rice—it turns rubbery and soggy immediately. Always reheat using dry heat (oven, air fryer, or pan) to maintain that signature crunch.
Make-ahead strategy: Cook rice 2-3 days ahead and refrigerate. Form into portions, freeze, and pull out as needed for quick crispy rice in minutes.
Flavor Variations and Global Inspirations
Asian-Inspired Crispy Rice Bowls
Japanese-Style: Top crispy rice with spicy tuna, avocado, cucumber, and drizzle with spicy mayo and eel sauce. Garnish with sesame seeds and scallions.
Korean Gochujang: Mix 2 tablespoons gochujang paste into rice before crisping. Top finished crispy rice with bulgogi beef, kimchi, and fried egg.
Thai Basil: Season rice with fish sauce and lime juice before crisping. Top with Thai basil chicken, fresh chilies, and crispy shallots.
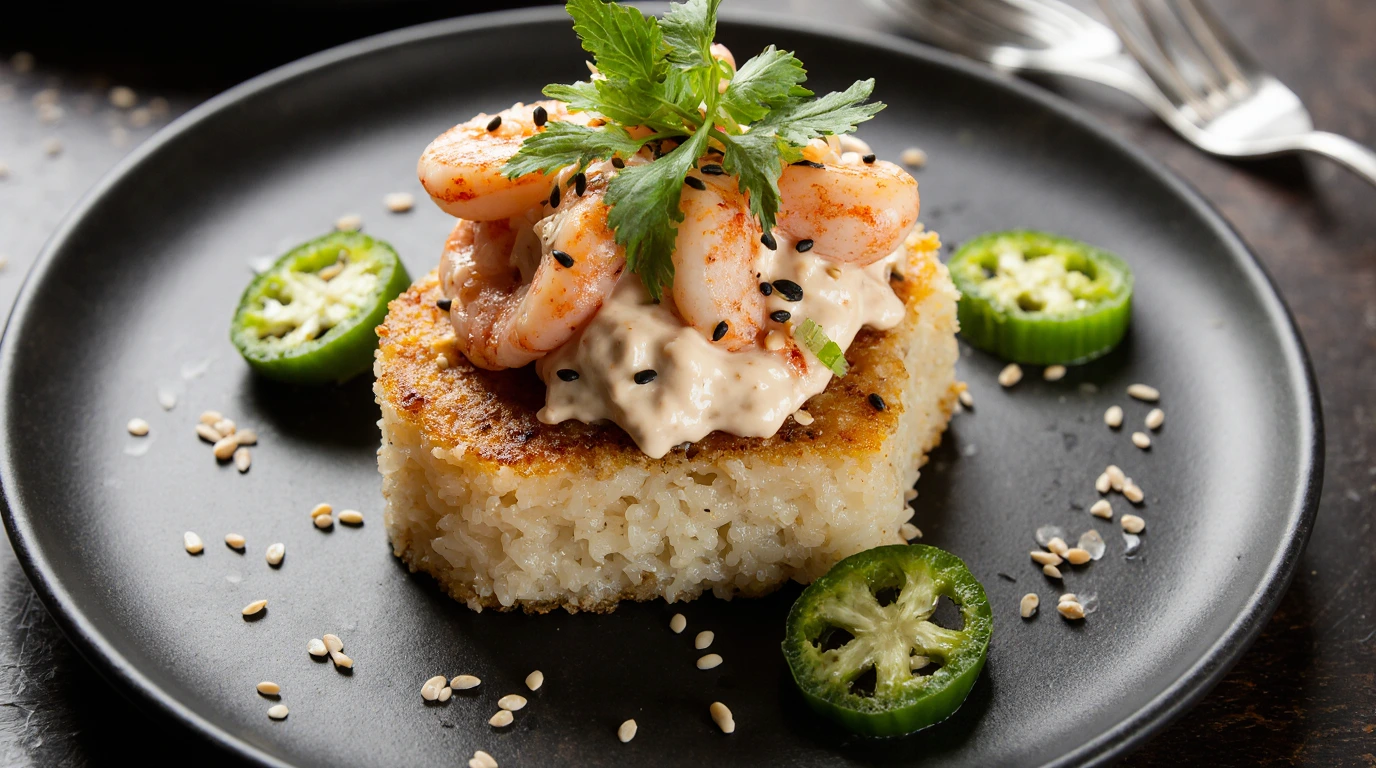
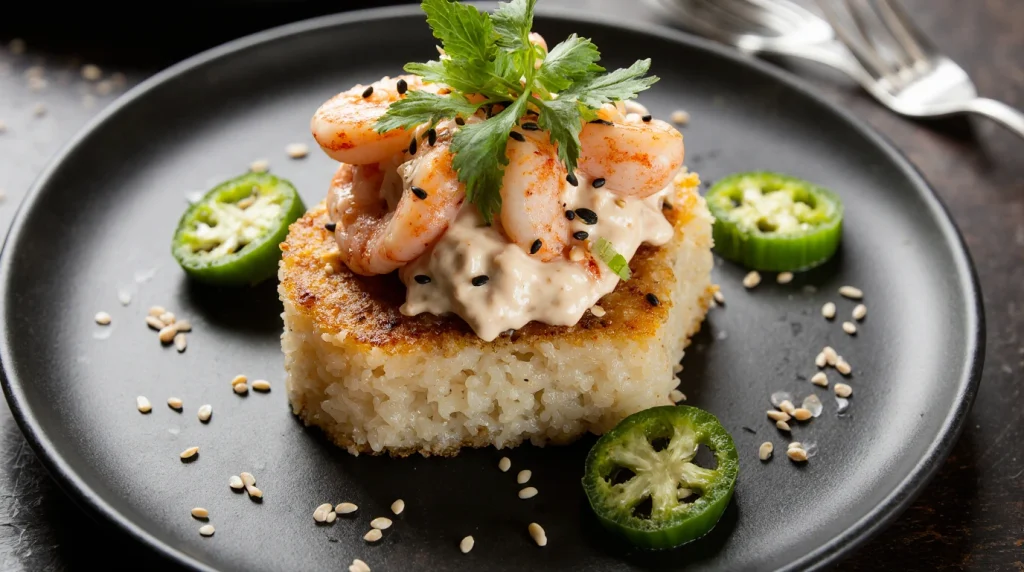
Spicy Shrimp Salad Topping (Restaurant Favorite)
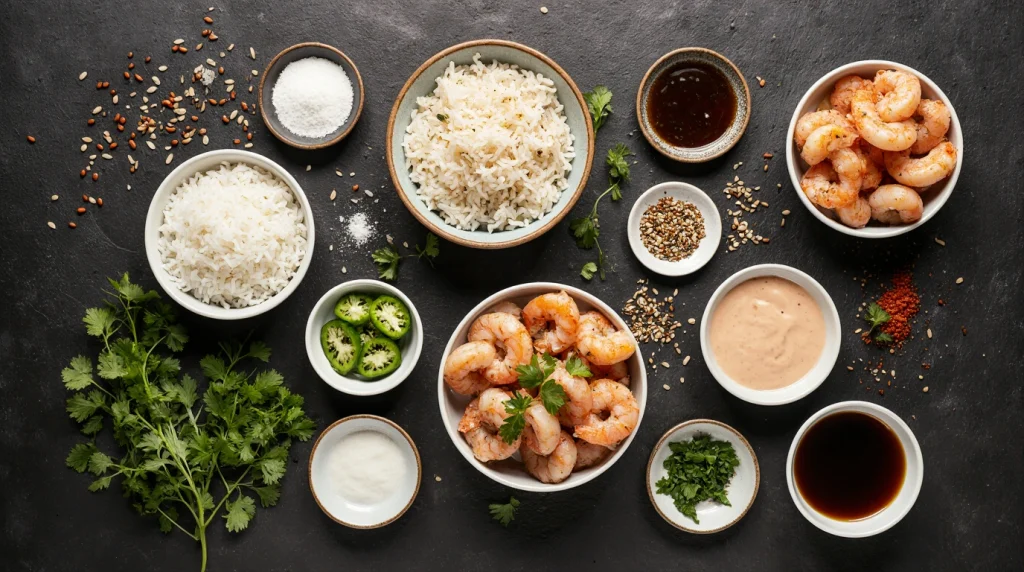
Ingredients:
- 1 lb shrimp, peeled and deveined
- 2 tablespoons sriracha mayo
- 1 tablespoon lime juice
- 1 cup shredded cabbage
- ½ cup diced cucumber
- 2 tablespoons cilantro
- 1 jalapeño, thinly sliced
Method: Sauté shrimp with garlic and chili flakes until pink (3-4 minutes). Toss with remaining ingredients. Pile generously onto crispy rice cakes. The cool, spicy, creamy topping contrasts perfectly with warm, crunchy rice.
Fusion and Creative Variations
Mexican-Inspired: Season rice with cumin and chili powder before crisping. Top with carnitas, pickled jalapeños, cotija cheese, and cilantro-lime crema.
Mediterranean: Mix chopped sun-dried tomatoes and herbs into rice before crisping. Top with lamb, tzatziki, olives, and feta.
Breakfast Crispy Rice: Top with soft-scrambled eggs, crispy bacon, cheddar cheese, and hot sauce for a satisfying morning meal.
Vegan Buddha Bowl: Top crispy rice with roasted vegetables, tahini dressing, chickpeas, and microgreens for a complete plant-based meal.
Serving Suggestions
Crispy rice is incredibly versatile and can anchor virtually any meal from breakfast through dinner.
As a main course base: Use crispy rice cakes as the foundation for protein bowls. Top with grilled salmon, teriyaki chicken, or tofu with vegetables and sauce. The crispy rice adds textural contrast and makes meals more satisfying.
As an appetizer: Cut crispy rice into small squares, top with tartare (tuna, salmon, or beef), and garnish with microgreens. Serve as elegant party appetizers that rival any restaurant offering.
As a side dish: Serve crispy rice alongside Asian-inspired dishes like Korean BBQ, Japanese curry, or Chinese stir-fries. The crunchy texture complements saucy main dishes perfectly.
Sauce pairings: Drizzle with soy-ginger sauce, sweet chili sauce, spicy mayo, ponzu, or yuzu kosho. The crispy texture holds up beautifully to sauces without becoming soggy immediately.
Garnishing for visual appeal: Top with thinly sliced scallions, toasted sesame seeds, nori strips, microgreens, or edible flowers. Use squeeze bottles for precise sauce drizzling in restaurant-style patterns.
Beverage pairings: Serve with Japanese green tea, sake, light beer like Asahi or Sapporo, or sparkling wine. The crispy, often slightly salty rice complements refreshing beverages.
FAQs
Can I use freshly cooked rice for crispy rice? You can, but results won’t be as crispy. Spread hot rice on a baking sheet and refrigerate uncovered for at least 2 hours to remove excess moisture. Day-old rice that’s been refrigerated overnight works significantly better because starches have crystallized and moisture has evaporated.
Why does my crispy rice fall apart when I flip it? Your rice is either too dry and not sticking together, or you’re flipping too early before the crust fully forms. Ensure you’re using short or medium-grain rice with enough starch. Press rice firmly when forming, and wait until you see deep browning and hear crackling before attempting to flip (usually 5-7 minutes).
How do I prevent crispy rice from sticking to the pan? Use a well-seasoned cast-iron or quality non-stick pan with adequate oil (2-3 tablespoons). Heat the pan fully before adding rice. Most importantly, don’t move the rice until a proper crust forms—premature flipping causes sticking. A fish spatula’s thin edge helps release stuck pieces.
Can I make crispy rice with brown rice or cauliflower rice? Yes to brown rice—it works well but takes 2-3 minutes longer to crisp and has chewier texture. Cauliflower rice is challenging because it contains much more moisture. If using cauliflower rice, squeeze out all liquid thoroughly, mix with an egg as a binder, and press very firmly. Results will differ from traditional crispy rice.
What’s the best oil for making crispy rice? Use neutral, high-heat oils like avocado oil (520°F smoke point), grapeseed oil (420°F), or refined coconut oil (400°F). These won’t burn at the high temperatures needed for proper crisping. Add a small amount of toasted sesame oil (½ teaspoon) for flavor, but never use it alone as it burns easily.
How do I reheat crispy rice without making it soggy? Never use the microwave. Reheat in a 400°F oven for 5-7 minutes, in an air fryer at 375°F for 3-4 minutes, or in a dry skillet over medium heat for 2-3 minutes per side. The key is using dry heat to re-crisp the exterior while warming the interior.
Can I freeze crispy rice for meal prep? Absolutely! Flash-freeze individual crispy rice cakes on a baking sheet for 1 hour, then transfer to freezer bags with parchment between layers. Freeze up to 2 months. Reheat directly from frozen in a 425°F oven for 10-12 minutes. This is perfect for make-ahead meal prep.
Is crispy rice safe for people with dietary restrictions? Basic crispy rice (rice and oil) is naturally gluten-free, dairy-free, and vegan. It’s safe during pregnancy when fully cooked. For low-carb diets, it’s not suitable unless using cauliflower rice alternative. Always check soy sauce and seasonings for allergens if serving others.
Conclusion
Transform your leftover rice and elevate your cooking game with these 7 foolproof crispy rice methods! Whether you choose the classic stovetop technique or modern air fryer shortcut, you’re just 15 minutes away from golden, restaurant-quality crispy rice that’ll impress everyone at your table.
Join over 25,000 home cooks who’ve discovered that crispy rice isn’t complicated restaurant magic—it’s an easy, versatile technique anyone can master with the right method. From breakfast bowls to elegant appetizers, these techniques open endless possibilities for transforming humble rice into something extraordinary.
Ready to explore more Asian-inspired recipes? Try our [Perfect Sushi Rice Recipe Guide] for the foundation of great homemade sushi, or check out [Korean Fried Chicken Wings] that pair perfectly with crispy rice for an unforgettable meal.
Share your crispy rice creations with us! Tag your photos and let us know which method became your favorite and what toppings you used. Which of these 7 techniques will you try first? Happy cooking!