

Cheesy Sandwiches with Dynamite Chicken
Table of Contents
Tired of bland, boring sandwiches that leave you reaching for chips just to feel satisfied? You know the ones—dry chicken, skimpy cheese, and zero excitement. It’s frustrating when lunch or dinner feels like an afterthought instead of something worth looking forward to.
Here’s the incredible news: these Cheesy Sandwiches with Dynamite Chicken deliver explosive flavor in every bite, combining crispy, spicy chicken with layers of melted cheese that stretch with every pull. The “dynamite” sauce—a perfect balance of creamy, spicy, and tangy—transforms ordinary chicken into something absolutely crave-worthy that’ll have everyone asking for seconds.
As a chef who’s spent over 12 years perfecting chicken recipes in both fast-casual restaurants and teaching home cooking classes, I’ve tested countless variations to create this foolproof version. This recipe strikes the perfect balance between restaurant-quality flavor and weeknight simplicity, using techniques that guarantee juicy chicken and that signature crispy coating every single time.
In this comprehensive guide, you’ll discover everything you need to create these addictive sandwiches at home: chicken selection tips for choosing the best cuts and preparation methods, cooking hacks that ensure crispy exteriors and juicy interiors, sauce-making secrets, assembly techniques for the perfect build, and answers to common questions in our detailed FAQ section. Let’s turn your kitchen into your new favorite sandwich shop.
Why This Cheesy Sandwiches with Dynamite Chicken Recipe Works
This isn’t just another chicken sandwich recipe—it’s an engineered flavor bomb that delivers on every level. Here’s what makes these Cheesy Sandwiches with Dynamite Chicken exceptional:
- Uses affordable, easy-to-find chicken breasts or thighs: No specialty cuts or expensive proteins required—regular boneless chicken from any grocery store creates restaurant-quality results when prepared correctly
- Ready in just 30 minutes from start to finish: Marinate the chicken for 15 minutes while you prep everything else, then cook and assemble for a fast weeknight dinner that tastes like you spent hours
- Perfect for weeknights or weekend gatherings: Simple enough for Tuesday dinner yet impressive enough for game day parties, casual entertaining, or satisfying those weekend cravings
- Crispy coating stays crunchy: The double-dredge technique and proper frying temperature create a coating that stays crispy even after adding sauce and cheese, preventing the dreaded soggy sandwich
- Customizable heat level: Adjust the spice in the dynamite sauce from mild to volcanic depending on your preference, making it family-friendly or fire-breathing as desired
- Make-ahead components save time: Prep the chicken, make the sauce, and prepare toppings in advance, then assemble and cook when ready to eat for maximum convenience
- Feeds a crowd without breaking the budget: One batch makes 4-6 hearty sandwiches at a fraction of restaurant cost, with ingredients that stretch your dollar beautifully
- Versatile serving options: Serve as sandwiches, wraps, salad toppers, or rice bowls—the dynamite chicken works in multiple formats for variety throughout the week

Choosing the Right Chicken
The foundation of perfect Cheesy Sandwiches with Dynamite Chicken starts with selecting the right chicken cut and preparing it properly. Your choice affects texture, juiciness, and cooking time.
Best Chicken Cuts for This Recipe
Boneless, skinless chicken breasts: These are the classic choice for chicken sandwiches because of their mild flavor and lean protein. When pounded to even thickness (about ½ inch), they cook quickly and evenly. The neutral taste allows the dynamite sauce to shine. Choose breasts that are similar in size for consistent cooking times.
Boneless, skinless chicken thighs: These are my secret weapon for the juiciest, most flavorful sandwiches. Thighs have more fat than breasts, making them nearly impossible to overcook and dry out. They stay tender and moist even if you cook them slightly longer than intended. The richer flavor stands up beautifully to bold spices and sauces.
Chicken tenderloins: These small, thin strips cook extremely fast (5-6 minutes total) and are naturally tender. Use 2-3 tenderloins per sandwich for proper coverage. They’re perfect if you’re in a hurry or cooking for kids who prefer smaller, more manageable pieces.
Chicken cutlets (pre-pounded breasts): Many grocery stores sell chicken breasts already pounded thin, which saves prep time. These cook evenly and quickly, making them an excellent convenience option for busy weeknights.
Buying Tips for Quality Chicken
Look for pink, not gray color: Fresh chicken should be pale pink (for breasts) or slightly darker pink (for thighs) with no gray patches, which indicate age or improper storage. The meat should look moist but not slimy.
Check the sell-by date carefully: Always choose chicken with the furthest-out sell-by date available. Fresh chicken makes a noticeable difference in flavor and texture. If you’re not cooking within 2 days, freeze it immediately.
Feel for firmness: Through the packaging, chicken should feel firm and spring back when pressed gently. Mushy or overly soft chicken may be starting to spoil.
Ask your butcher for same-size pieces: If buying from a butcher counter, ask for breasts or thighs that are similar in size and weight. This ensures even cooking—you won’t have some pieces done while others are still raw in the middle.
Consider organic or air-chilled options: While more expensive, organic chicken often has better flavor and texture. Air-chilled chicken (vs. water-chilled) hasn’t absorbed extra water weight, so it browns better and tastes more concentrated.
Buy in bulk and freeze: Chicken freezes excellently for up to 9 months. When you find a good sale, stock up. Freeze pieces individually on a baking sheet first, then transfer to freezer bags so you can grab exactly what you need.
Chicken Substitutions and Alternatives
Swap chicken for turkey cutlets: Turkey breast cutlets work identically to chicken in this recipe. They’re lean, cook quickly, and absorb marinades well. The flavor is slightly milder but equally delicious.
Use pork tenderloin for variety: Slice pork tenderloin into ½-inch medallions and pound slightly. The cooking method and timing remain similar, creating a different but equally tasty sandwich option.
Try firm tofu for vegetarian version: Press extra-firm tofu, slice into ½-inch slabs, marinate, coat in the same breading, and fry until golden. The crispy exterior and spicy sauce make it surprisingly satisfying even for meat-eaters.
Substitute fish for a seafood twist: Firm white fish like cod, halibut, or mahi-mahi can replace chicken using the same breading technique. Adjust cooking time to 3-4 minutes per side depending on thickness.
Ingredients & Prep
Proper preparation and having all ingredients ready before you start cooking makes this recipe smooth and stress-free. Let’s break down what you need.
DOUGH
- 75 ml water
- 200 ml milk
- 15 g honey
- 9 g instant yeast
- 1 egg
- 30 ml sunflower oil
- 600 g flour
- 8 g salt
- 25 g butter
TOPPING
- 40 g Parmesan cheese
- 2 g cayenne pepper
- 1.5 g onion powder
- 1 g black pepper
CHICKEN MIXTURE
- 700 g chicken breast
- 5 g salt
- 3 g onion powder
- 3 g garlic powder
- 4 g cayenne pepper
- 1.5 g black pepper
- 15 g sambal oelek
- 10 ml soy sauce
- 1 egg
EXTRA
- melk
MAÏZENAMENGSEL
- 150 g maïzena
- 2 g zout
- 1.5 g zwarte peper
- 3 g uienpoeder
SAUS
- 120 g mayonaise
- 75 g chilisaus (Go-Tan)
- 20 g sambal
Essential tools:
- Meat mallet or rolling pin for pounding chicken
- Three shallow dishes for breading station
- Large skillet or deep fryer
- Instant-read thermometer
- Wire rack set over baking sheet
- Tongs for flipping
- Paper towels for draining
Step-by-Step Cooking Instructions
Follow these detailed steps for perfectly crispy, juicy chicken every time. Precision and timing make all the difference.
Pre-Cooking Prep
Step 1 – Marinate the chicken: At least 15 minutes before cooking (up to 4 hours if planning ahead), place pounded chicken in buttermilk marinade. If marinating longer than 30 minutes, refrigerate. Remove from refrigerator 10 minutes before cooking to take the chill off—room temperature chicken cooks more evenly.
Step 2

In a large bowl, combine warm water, warm milk, honey, and yeast. Let it sit for 5–10 minutes until the yeast activates.
Step 3
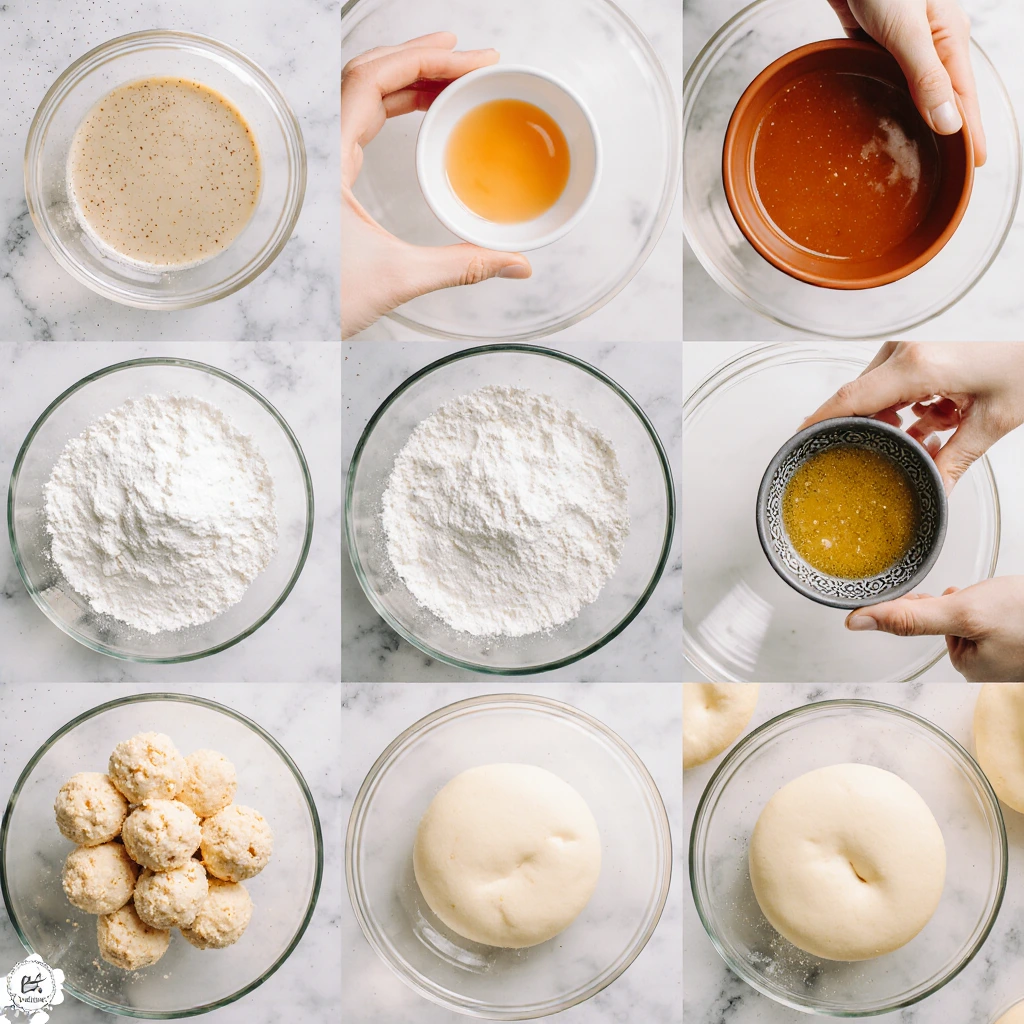
Add the beaten egg and oil. Mix well. Then add the flour, salt, and butter. Knead the dough for 10–12 minutes until smooth. Cover the dough and let it rise in a warm place for 1 hour.
Step 4
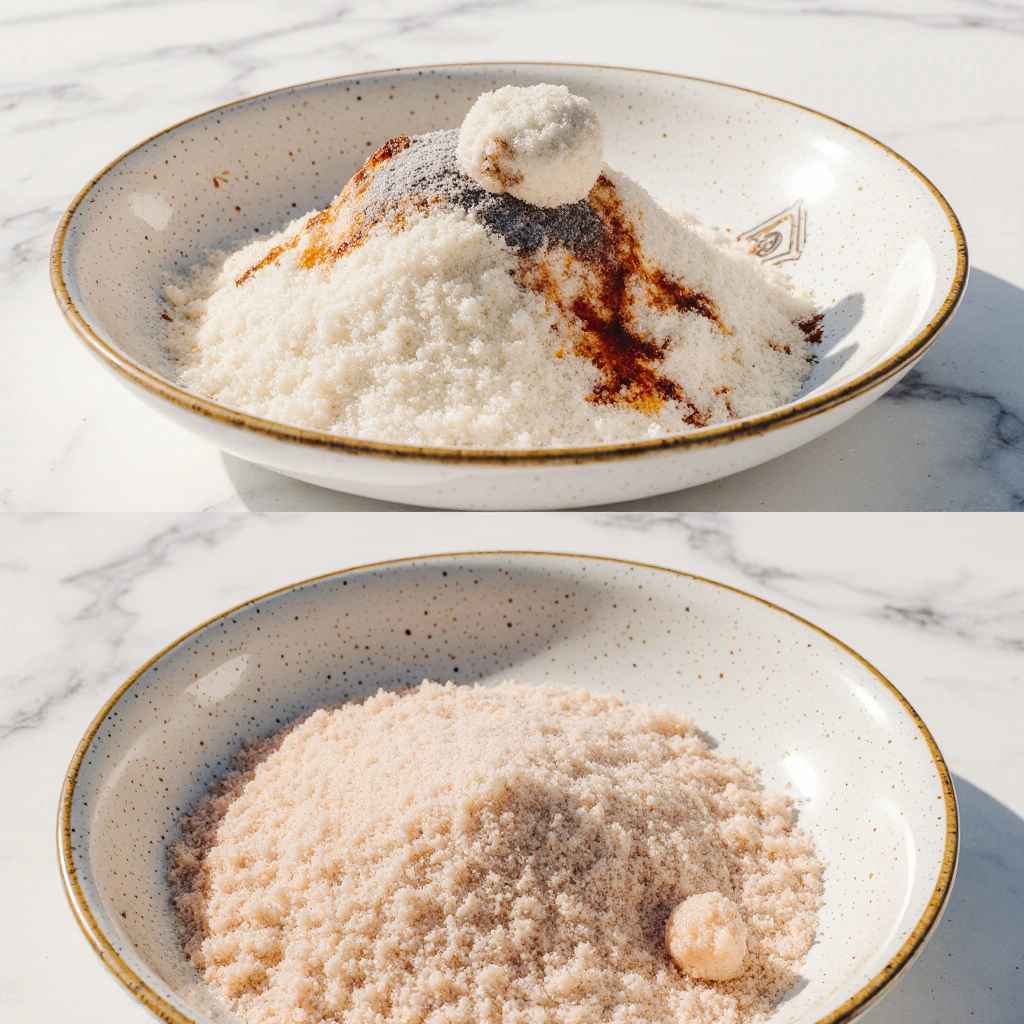
In a separate bowl, combine the Parmesan cheese, chili powder, onion powder, and black pepper. Mix well and set aside.
Step 5

Wash the chicken breast and cut it into pieces. Place it in a bowl and add the salt, onion powder, garlic powder, chili powder, black pepper, sambal sauce, soy sauce, and beaten egg. Mix well and cover the bowl. Let the mixture rest in the refrigerator.
Step 6
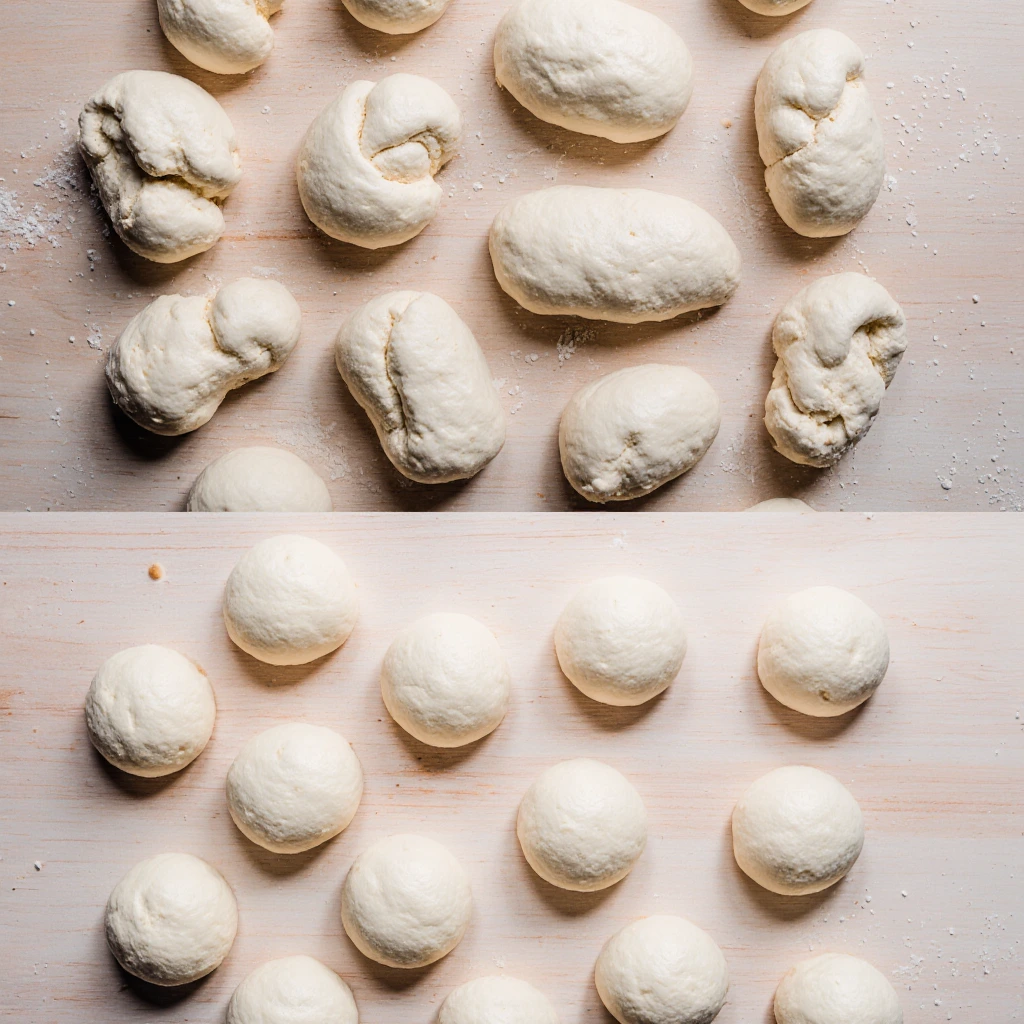
Take a ball of the risen dough and flatten it in a baking tray. Divide it into 14 equal pieces, each weighing approximately 70 grams. Shape each piece into a ball.
Step 7
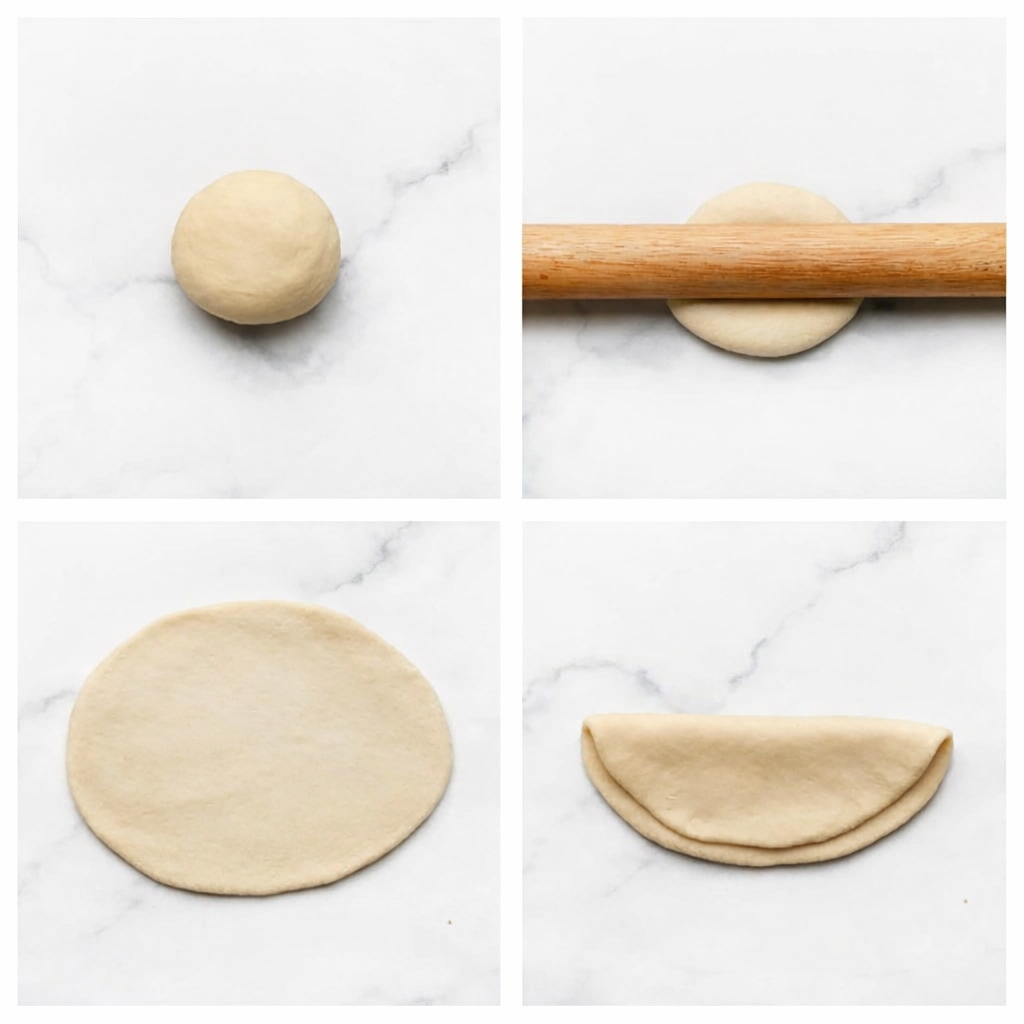
Roll out a ball of dough approximately 15 x 13 cm, then fold it in half.
Step 8
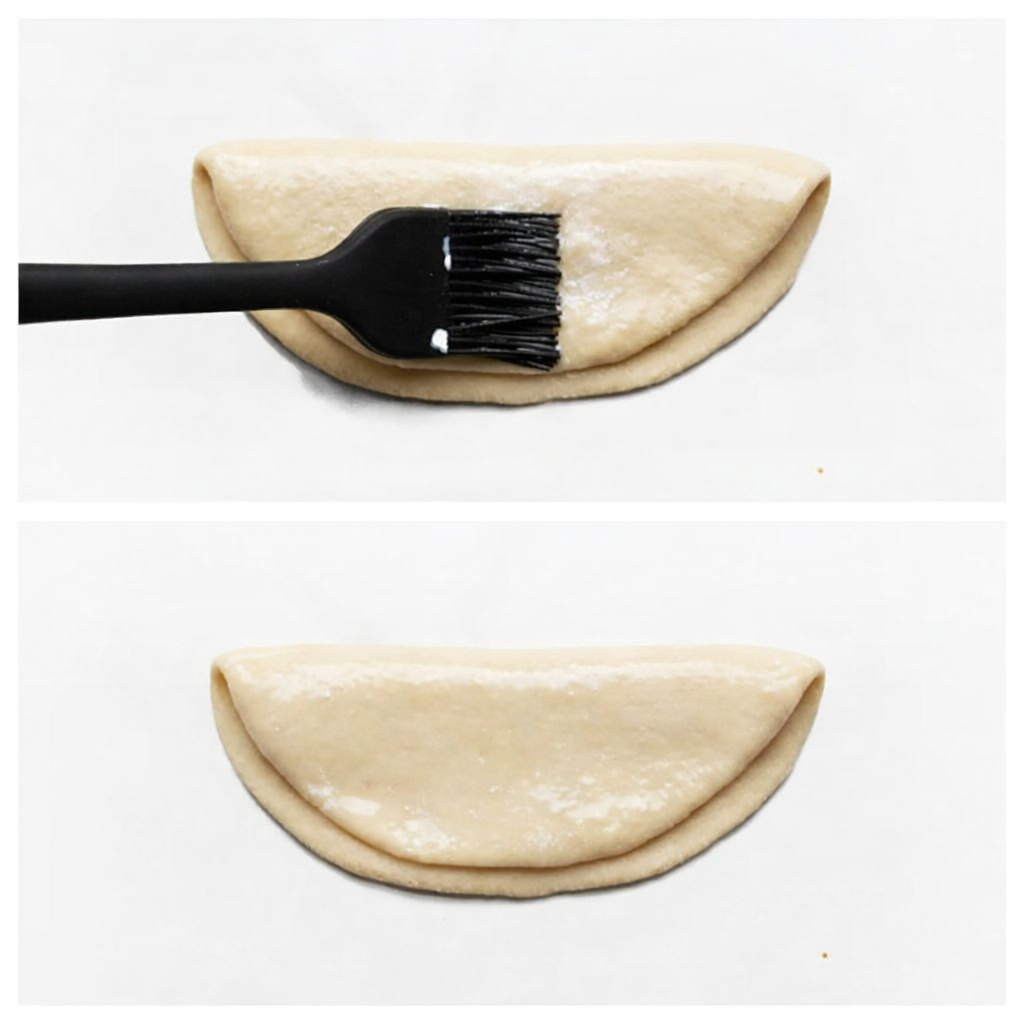
Brush the surface with milk.
Step 9
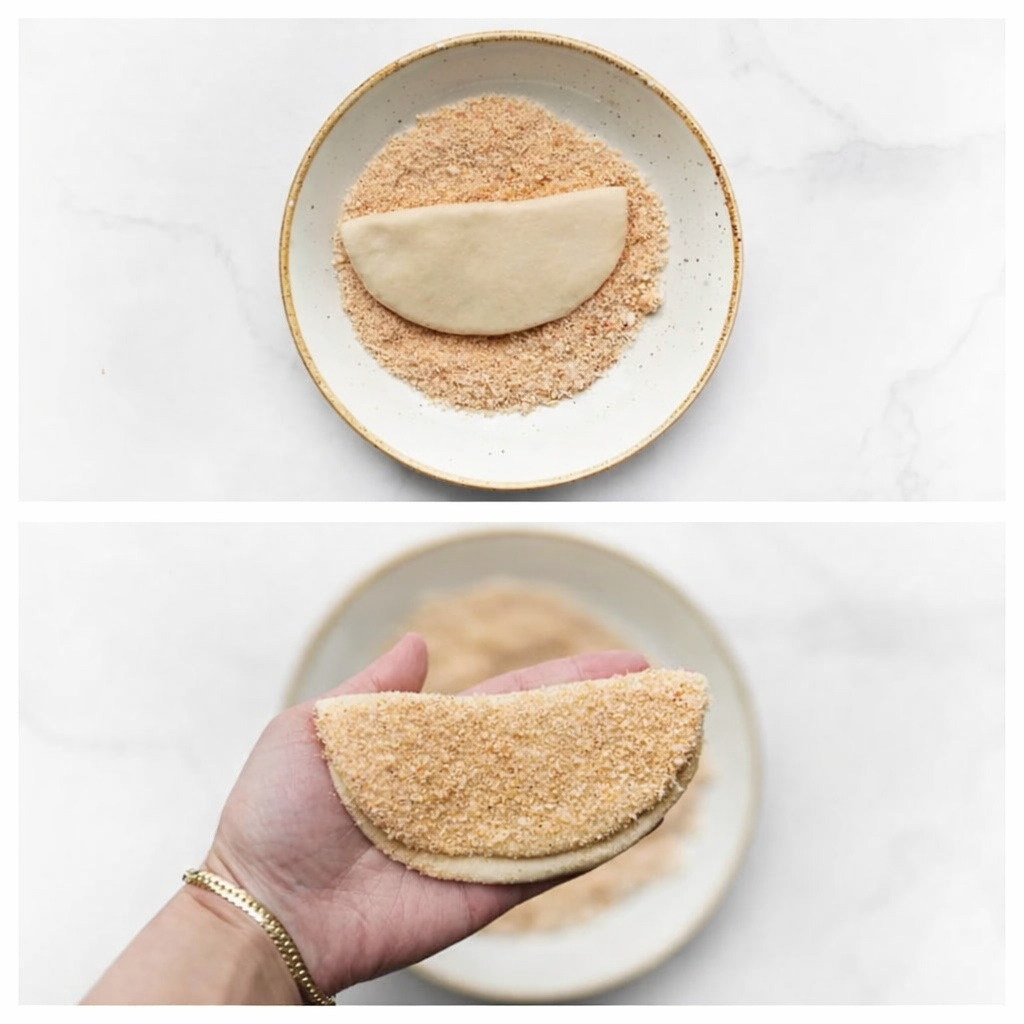
Spread one side of the dough with the Parmesan mixture.
Step 10
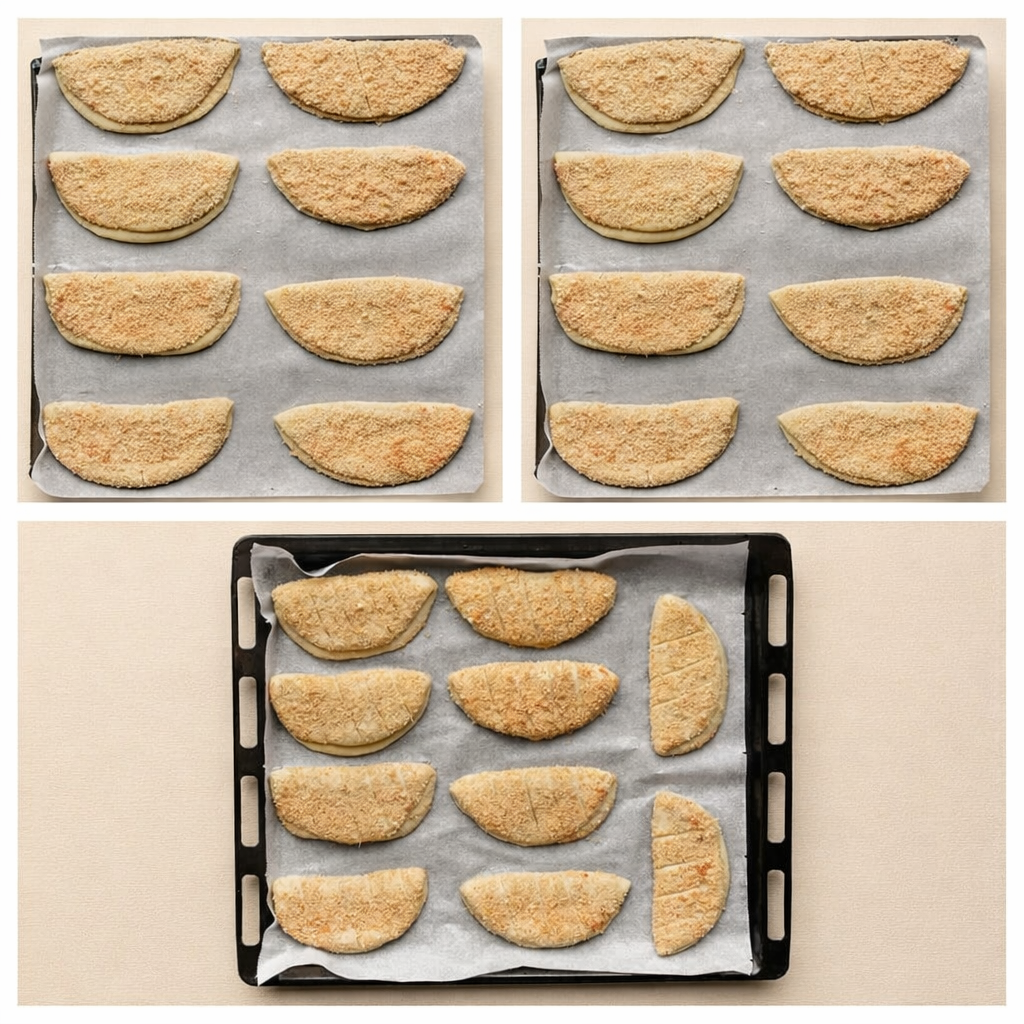
Place the dough on a baking sheet lined with parchment paper and make small slits in the surface. Let it rise for 30 minutes, or until doubled in size.
Step 11
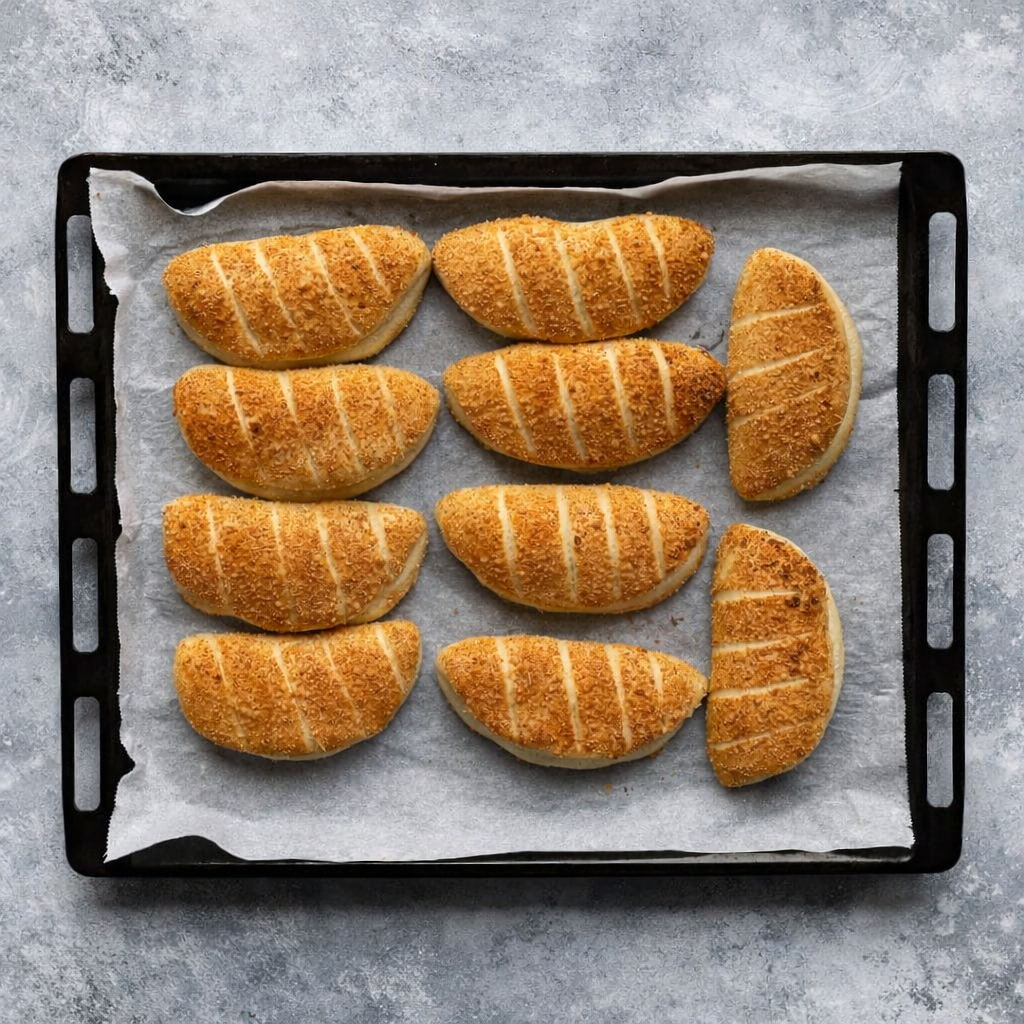
Place the dough rolls in a preheated oven at 200°C (400°F). Bake for 12-15 minutes, or until golden brown. Keep an eye on the baking time, as ovens vary.
Step 12
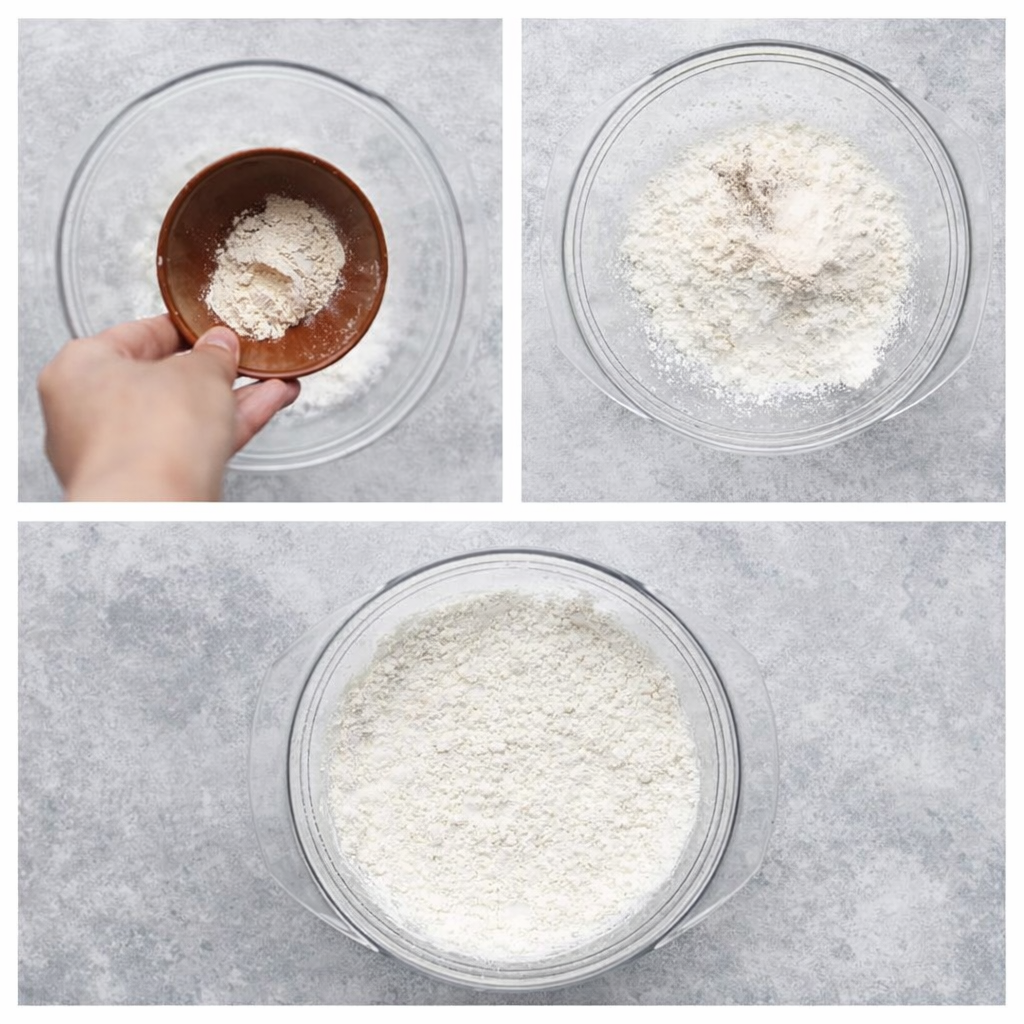
Mix the cornstarch, salt, black pepper, and onion powder in a bowl.
Step 13
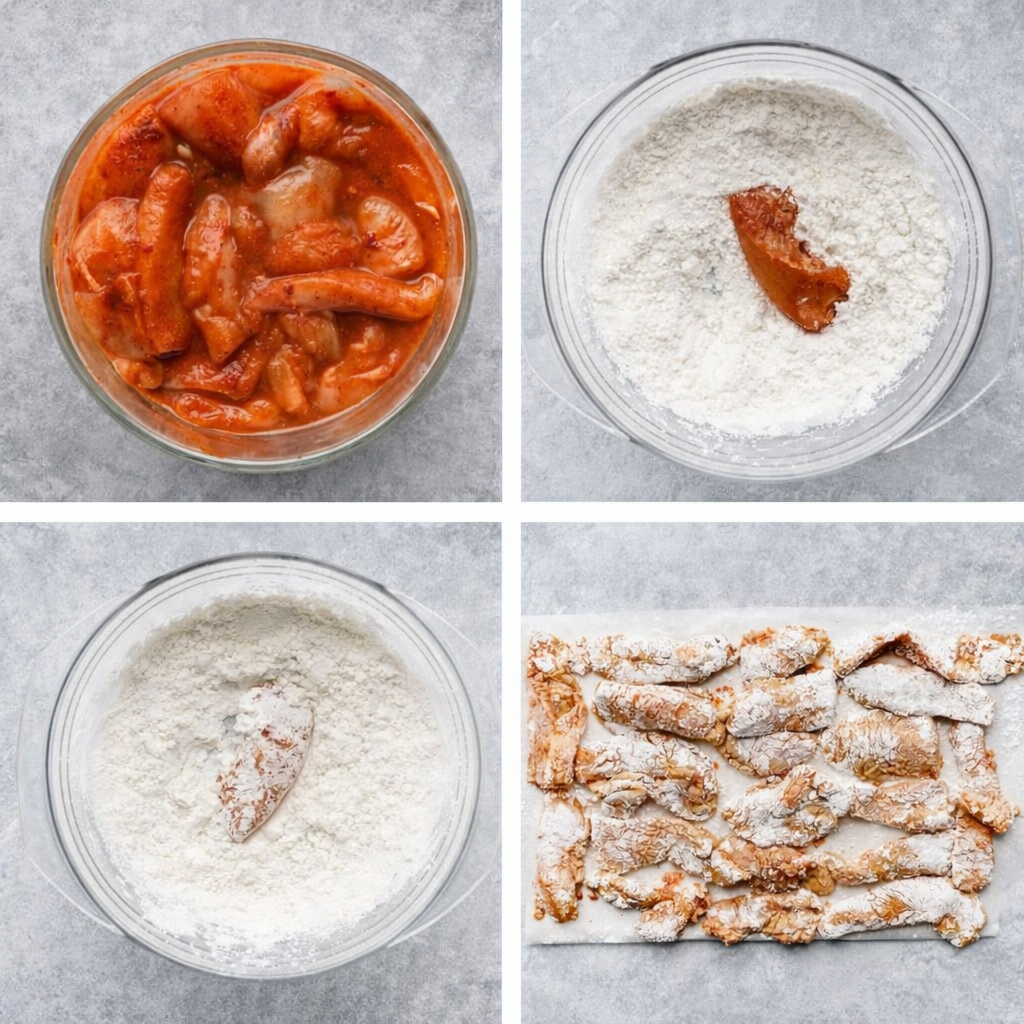
Coat the chicken completely in the cornstarch mixture. Place it on a sheet of parchment paper.
Step 14
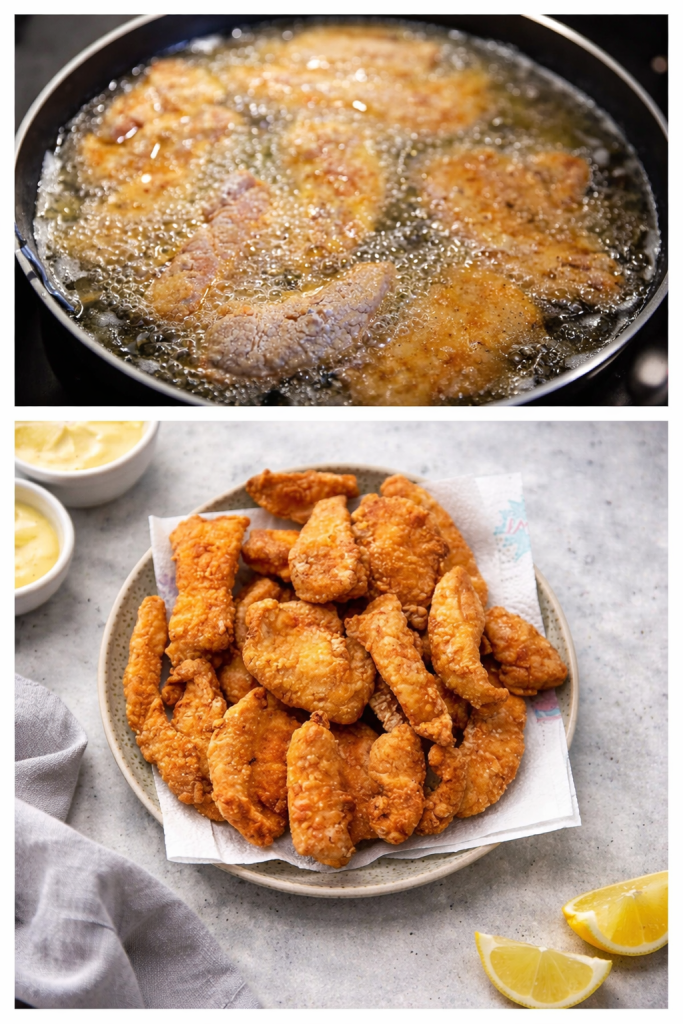
Heat a layer of oil in a frying pan over medium heat (175°C (350°F)). Cook the chicken until golden brown, then drain on paper towels.
Step 15
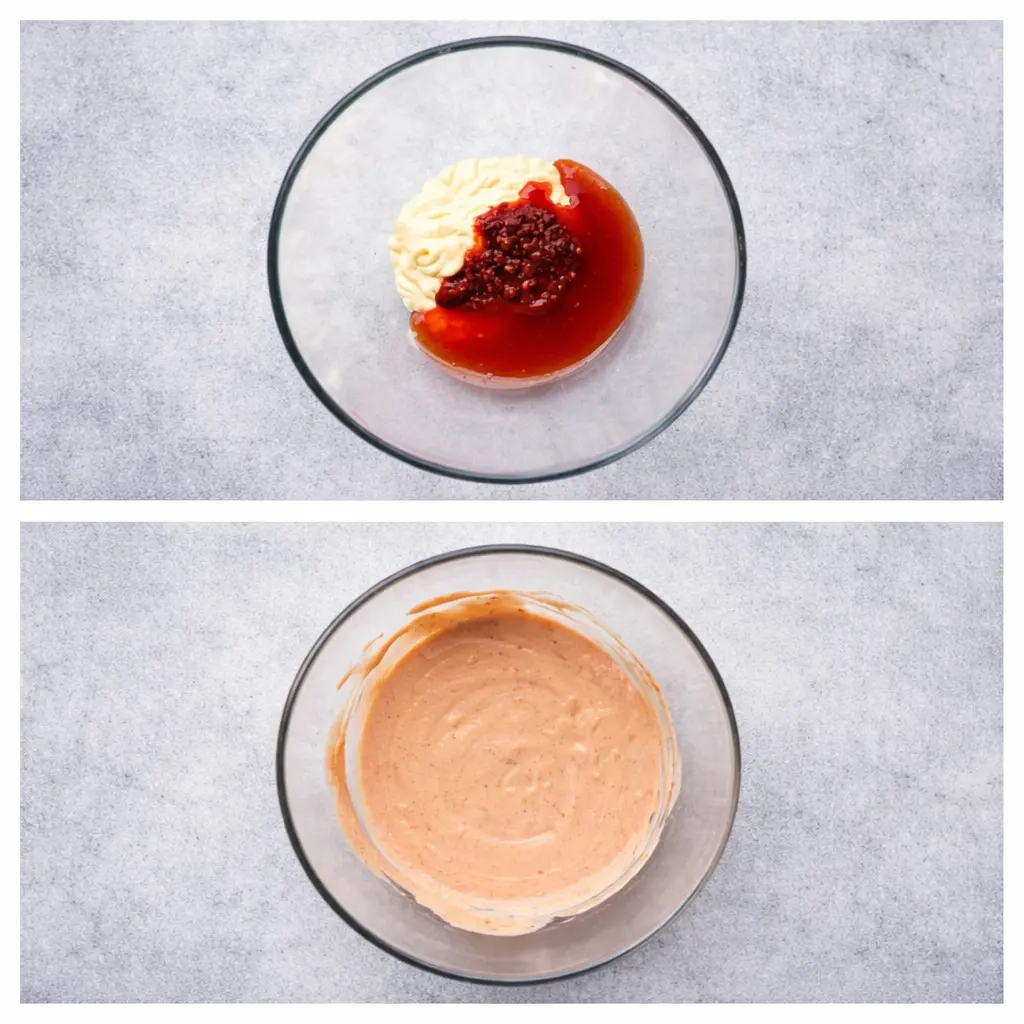
Combine the mayonnaise, hot sauce, and sambal sauce in a bowl.
Step 16
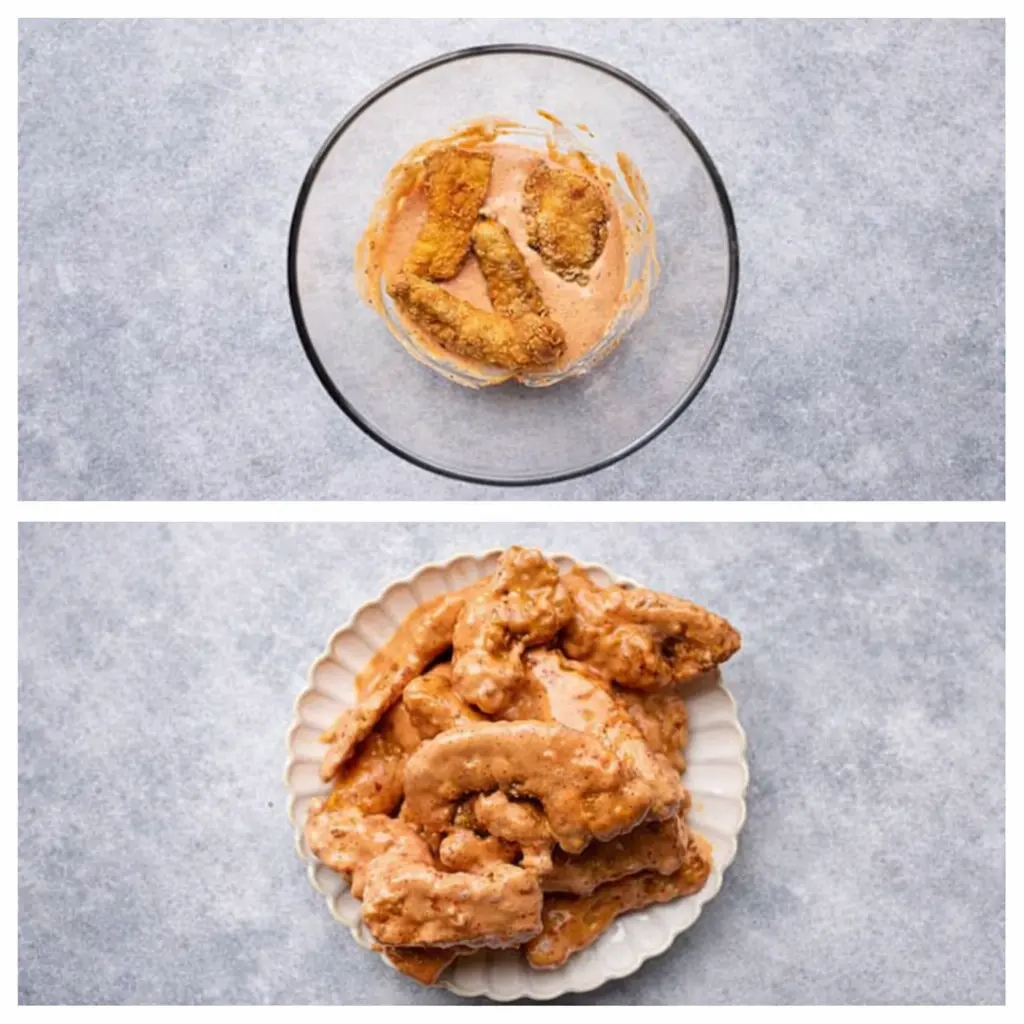
Toss the cooked chicken with the sauce.
Step 17
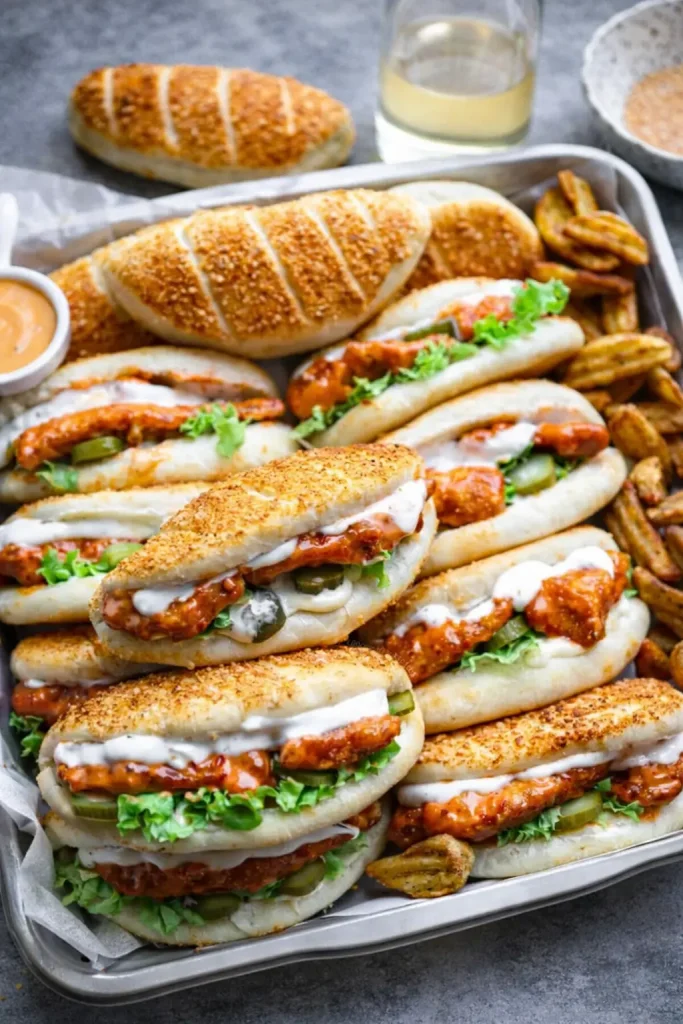
Ready to serve! Serve the sandwiches warm and enjoy the crispy chicken, melted cheese, and spicy flavor.
Pro Tips for Perfect Cheesy Sandwiches with Dynamite Chicken
Master these professional techniques to troubleshoot issues and achieve restaurant-quality results every single time.
Avoiding Soggy or Dry Chicken
Don’t skip the buttermilk marinade: This step is non-negotiable for tender, juicy chicken. The acid breaks down proteins, making the meat more tender, while keeping it moist during high-heat cooking.
Maintain consistent oil temperature: Use a thermometer and adjust heat as needed to keep oil at 350°F. When you add chicken, the temperature will drop—this is normal. Let it recover before adding more pieces.
Don’t overcook: Chicken is done at 165°F internal temperature. Overcooking even by 2-3 minutes can turn juicy chicken dry and stringy. Use an instant-read thermometer inserted into the thickest part to check.
Let coating set before frying: After breading, let chicken rest on the rack for 5 minutes. This allows the coating to adhere better and prevents it from falling off during frying.
Sauce at the right moment: Toss chicken in dynamite sauce while it’s still hot from frying. The heat helps the sauce penetrate slightly without making the coating soggy. Don’t sauce too early and let it sit—apply sauce, add cheese, and build sandwiches relatively quickly.
Tool Recommendations
Instant-read thermometer is essential: This is the single most important tool for perfect chicken. It eliminates guessing and prevents both undercooking (unsafe) and overcooking (dry). A good digital thermometer costs $15-25 and will transform your cooking.
Cast-iron skillet for even heat: Cast iron retains heat beautifully and maintains consistent temperature even when cold chicken is added. The heavy bottom prevents hot spots that can burn coating.
Wire cooling rack: Setting a wire rack over a baking sheet allows air to circulate under fried chicken, keeping the bottom crispy instead of steaming on paper towels. This also lets excess oil drip away.
Meat mallet for even thickness: A proper meat mallet (flat side) creates uniform ½-inch thickness quickly and easily. You can also use a rolling pin or heavy skillet in a pinch.
Splatter screen for cleaner cooking: This mesh screen covers your skillet while allowing steam to escape, reducing oil splatter all over your stovetop while maintaining crispiness.
Storage & Reheating
Refrigerator storage: Store leftover fried chicken (without buns or fresh toppings) in an airtight container in the refrigerator for up to 3 days. Store dynamite sauce separately. Don’t assemble sandwiches until ready to eat.
Freezing fried chicken: Freeze cooked, cooled chicken pieces in a single layer on a baking sheet until solid, then transfer to freezer bags for up to 3 months. Don’t freeze assembled sandwiches—only the chicken component.
Reheating for crispy results: Never microwave if you want to maintain crispiness. Instead, reheat in a 375°F oven on a wire rack for 10-12 minutes until heated through and exterior crisps up again. Air fryer works even better—375°F for 6-8 minutes.
Make-ahead strategy: Bread the chicken and refrigerate uncooked for up to 4 hours before frying. Make dynamite sauce up to 3 days ahead. Toast buns and prep vegetables the morning of serving. Fry chicken fresh when ready to eat.
Keeping chicken warm for a crowd: If cooking multiple batches, keep finished chicken warm in a 200°F oven on a wire rack. Don’t stack pieces or they’ll steam and lose crispiness.
Flavor Variations
Transform your base Cheesy Sandwiches with Dynamite Chicken into exciting new versions while maintaining the crispy, cheesy, spicy elements that make the original irresistible.
Nashville Hot Variation
Replace the dynamite sauce with Nashville hot sauce—a mixture of cayenne pepper, brown sugar, garlic powder, and the frying oil itself. After frying, brush the hot oil-spice mixture over the chicken, then add pickles and white bread for authentic Nashville style. This version brings serious heat and tang that hot chicken lovers crave.
Korean BBQ Fusion
Marinate chicken in a mixture of gochujang (Korean chili paste), soy sauce, honey, sesame oil, and garlic instead of buttermilk. Bread and fry as directed. Top with gochujang mayo instead of dynamite sauce, add kimchi, and use sesame seed buns. The sweet-spicy Korean flavors create an addictive fusion sandwich.
Buffalo Ranch Style
Toss fried chicken in buffalo wing sauce (Frank’s RedHot mixed with melted butter) instead of dynamite sauce. Use blue cheese or ranch dressing on the buns, add extra pickles and celery slaw. This captures all the flavors of buffalo wings in sandwich form—perfect for game day.
Jalapeño Popper Inspired
Mix diced jalapeños into the breading mixture. Use pepper jack cheese for melting. Make a jalapeño-cream cheese spread by mixing softened cream cheese with minced jalapeños and garlic. Add bacon for the ultimate indulgent version. Every element echoes the popular appetizer.
Italian Parmesan Twist
Add ½ cup grated parmesan to the flour mixture for breading. After frying, top with marinara sauce and mozzarella cheese instead of dynamite sauce and cheddar. Broil until bubbly for a chicken parmesan sandwich that’s crispy, saucy, and cheesy.
Honey Mustard Sweet Heat
Make a honey-mustard dynamite sauce by replacing sriracha with whole-grain mustard and increasing honey to 3 tablespoons. This creates a sweeter, tangier version that’s less spicy but equally flavorful—perfect for those who can’t handle heat.
BBQ Bacon Cheddar
Replace dynamite sauce with your favorite BBQ sauce (smoky varieties work best). Use sharp cheddar cheese and add crispy bacon strips, fried onion straws, and coleslaw. This Southern-inspired version brings barbecue flavor to the crispy chicken sandwich format.
Keto-Friendly Low-Carb
Replace the flour coating with a mixture of almond flour, parmesan cheese, and pork rind crumbs for a low-carb crust that still fries up crispy. Use lettuce wraps instead of buns, and ensure your dynamite sauce has no added sugar. All the flavor without the carbs.
Breakfast Sandwich Version
Top your fried chicken with a fried egg, American cheese, and hot sauce on a toasted English muffin or biscuit. This creates an indulgent breakfast sandwich that combines all the best morning flavors with crispy dynamite chicken.
Serving Suggestions
Complete your Cheesy Sandwiches with Dynamite Chicken meal with complementary sides, drinks, and presentation ideas that enhance the experience.
Perfect Side Dish Pairings
Classic french fries: Crispy, golden fries are the traditional pairing that never fails. Season with salt and a sprinkle of garlic powder or Old Bay. Sweet potato fries offer a slightly healthier twist with complementary sweetness.
Creamy coleslaw: The cool, crunchy slaw provides refreshing contrast to hot, spicy chicken. The creamy dressing balances the heat beautifully. Apple cider vinegar-based slaw offers a tangier, lighter option.
Onion rings: Keep the fried food theme going with crispy onion rings. The sweet onion flavor pairs wonderfully with spicy chicken and adds textural variety.
Pickle fries or fried pickles: If you love the pickles on the sandwich, take it further with breaded and fried pickle spears. The tangy crunch is addictive alongside dynamite chicken.
Loaded potato wedges: Season potato wedges with cajun spice, roast until crispy, then top with cheese, bacon, and green onions for an indulgent side that matches the sandwich’s energy.
Simple green salad: Balance the richness with a light salad dressed in lemon vinaigrette. The acidity and freshness cleanse the palate between bites of rich sandwich.
Mac and cheese: Creamy, cheesy mac complements the sandwich’s flavors while adding comfort food appeal. Try adding jalapeños or bacon to your mac for extra flavor layers.
Beverage Pairings
Beer selections: Light lagers and pilsners cut through richness with crisp, clean flavor. IPAs provide hoppy bitterness that complements spicy heat. Wheat beers like hefeweizen offer subtle sweetness that balances dynamite sauce.
Soft drinks: Classic cola’s sweetness and carbonation refresh the palate. Ginger ale or ginger beer provides spicy notes that echo the chicken. Lemonade offers tart refreshment that cools heat.
Milkshakes: An indulgent milkshake—vanilla, chocolate, or strawberry—provides cool, creamy contrast to spicy chicken in a nostalgic diner-style pairing. The cold dairy soothes heat effectively.
Iced tea: Sweet or unsweetened iced tea is a Southern classic with fried chicken. Add lemon for extra brightness. Peach iced tea brings fruity sweetness that many find irresistible.
Wine pairings: If serving wine, choose off-dry Riesling or Gewürztraminer—the slight sweetness balances heat while acidity cuts richness. Sparkling wine also works beautifully with fried foods.
Presentation Ideas
Serve on parchment or deli paper: Line baskets or plates with checkered parchment or butcher paper for a casual, diner-style presentation that captures grease and looks Instagram-worthy.
Skewer for stability: Insert a toothpick or small skewer through the center of tall sandwiches to hold everything together and make them easier to pick up and eat.
Cut on the diagonal: Slice sandwiches diagonally before serving to show off the layers—crispy coating, melted cheese, fresh vegetables. The cross-section is beautiful and makes eating easier.
Create a sandwich board: For parties, set up a DIY station with fried chicken, various cheeses, multiple sauce options, and toppings so guests can customize their own Cheesy Sandwiches with Dynamite Chicken.
Garnish thoughtfully: Add a pickle spear on the side, a sprinkle of fresh herbs like cilantro or parsley on the plate, or a small ramekin of extra dynamite sauce for dipping fries.
FAQs
Can I use frozen chicken for Cheesy Sandwiches with Dynamite Chicken?
You must fully thaw frozen chicken before using it in this recipe. Never bread and fry frozen or partially frozen chicken—the outside will burn before the inside cooks through, creating serious food safety issues. Thaw chicken safely in the refrigerator overnight (8-12 hours), or use the cold water method by submerging sealed chicken in cold water, changing the water every 30 minutes until thawed (2-3 hours). Once fully thawed, proceed with the recipe as written, marinating in buttermilk before breading and frying.
How do I fix overcooked, dry chicken?
Prevention is easier than fixing, but if your chicken turned out dry, you can salvage it by slicing it and tossing generously with extra dynamite sauce or ranch dressing to add back moisture. Alternatively, chop the dry chicken and use it in a different format—chicken salad with mayo and celery, quesadillas with extra cheese, or mixed into pasta with cream sauce. For next time, use an instant-read thermometer and remove chicken from heat at exactly 165°F internal temperature.
Why isn’t my breading staying crispy?
Breading falls off or gets soggy for several reasons. First, the chicken may have been too wet when breading—let excess buttermilk drip off but don’t rinse or pat dry. Second, oil temperature was too low—maintain 350°F consistently. Third, you may have skipped the resting period after breading—let coated chicken sit for 5 minutes before frying. Fourth, you placed fried chicken directly on paper towels instead of a wire rack, causing the bottom to steam. Fifth, you assembled sandwiches too far in advance—crispy chicken should go on buns immediately before serving.
Can I bake the chicken instead of frying?
Yes, you can bake for a lighter version, though the texture will differ from fried. After breading, place chicken on a wire rack set over a baking sheet. Spray generously with cooking spray or brush with oil. Bake at 425°F for 20-25 minutes, flipping halfway through and spraying the second side. The coating will be crispy but not quite as crunchy as deep-fried. For even better results, try air frying at 400°F for 12-15 minutes, flipping halfway.
What’s the best cheese for these sandwiches?
American cheese is the classic choice because it melts smoothly and evenly without becoming oily or grainy. Its mild flavor doesn’t compete with the dynamite sauce. However, sharp cheddar provides more pronounced flavor, pepper jack adds extra heat, and mozzarella creates stretchy, gooey pulls. You can also use a combination—American for melting properties plus cheddar for flavor. Use two slices per sandwich for optimal cheese coverage and that satisfying cheese pull.
How spicy are Cheesy Sandwiches with Dynamite Chicken?
The spice level is completely adjustable based on your preference. The recipe as written creates medium heat that most people find pleasantly spicy but not painful. Reduce sriracha to 1 tablespoon for mild heat, increase to 3-4 tablespoons for serious heat. You can also add cayenne pepper to the breading for extra kick. Remember that dairy (cheese, ranch dressing) and carbs (bread) help temper heat, while acidic ingredients (pickles, vinegar slaw) can intensify it.
Can I make the dynamite sauce ahead of time?
Absolutely! The dynamite sauce actually improves when made in advance, allowing the flavors to meld together. Prepare it up to 3 days ahead and store in an airtight container in the refrigerator. Bring to room temperature before using for easier spreading, or warm very gently in the microwave for 10-15 seconds. Making the sauce ahead is actually one of the best time-saving strategies for this recipe.
Are Cheesy Sandwiches with Dynamite Chicken safe during pregnancy?
Yes, these sandwiches are safe for pregnant women as long as the chicken is cooked to the proper internal temperature of 165°F, which this recipe ensures. The mayo-based dynamite sauce uses commercial mayonnaise, which is made with pasteurized eggs and is safe during pregnancy. All ingredients are fully cooked with no raw components. As with any dietary concerns during pregnancy, consult your healthcare provider if you have specific questions about ingredients or preparation.
Conclusion
Ready to blow your taste buds away with the most exciting chicken sandwich you’ve ever made? Grab your ingredients and make these Cheesy Sandwiches with Dynamite Chicken tonight! The combination of crispy, perfectly seasoned chicken, spicy-creamy dynamite sauce, and gooey melted cheese creates a flavor explosion that’ll have everyone at your table going back for seconds. Whether you’re feeding hungry teenagers, impressing dinner guests, or treating yourself to an epic comfort food meal, this recipe delivers restaurant-quality results with straightforward home kitchen techniques.
Join the thousands of home cooks who’ve already discovered how easy it is to create these addictive sandwiches at home. This recipe has earned rave reviews from people who say it’s better than their favorite restaurant version and now make it weekly. Share your creations and tag us—we love seeing your delicious results and creative variations!
Once you’ve mastered these Cheesy Sandwiches with Dynamite Chicken, explore more flavor-packed recipes like our Crispy Buffalo Chicken Tenders for another spicy favorite, or try our Ultimate Fried Chicken Sandwich Guide for more breading techniques and flavor combinations. Looking for more ways to use dynamite sauce? Check out our Dynamite Shrimp Recipe for a seafood twist on the same addictive flavors.
Don’t forget to bookmark this recipe and share it with friends who love bold, crave-worthy food. Your new favorite sandwich is just one fry away!