
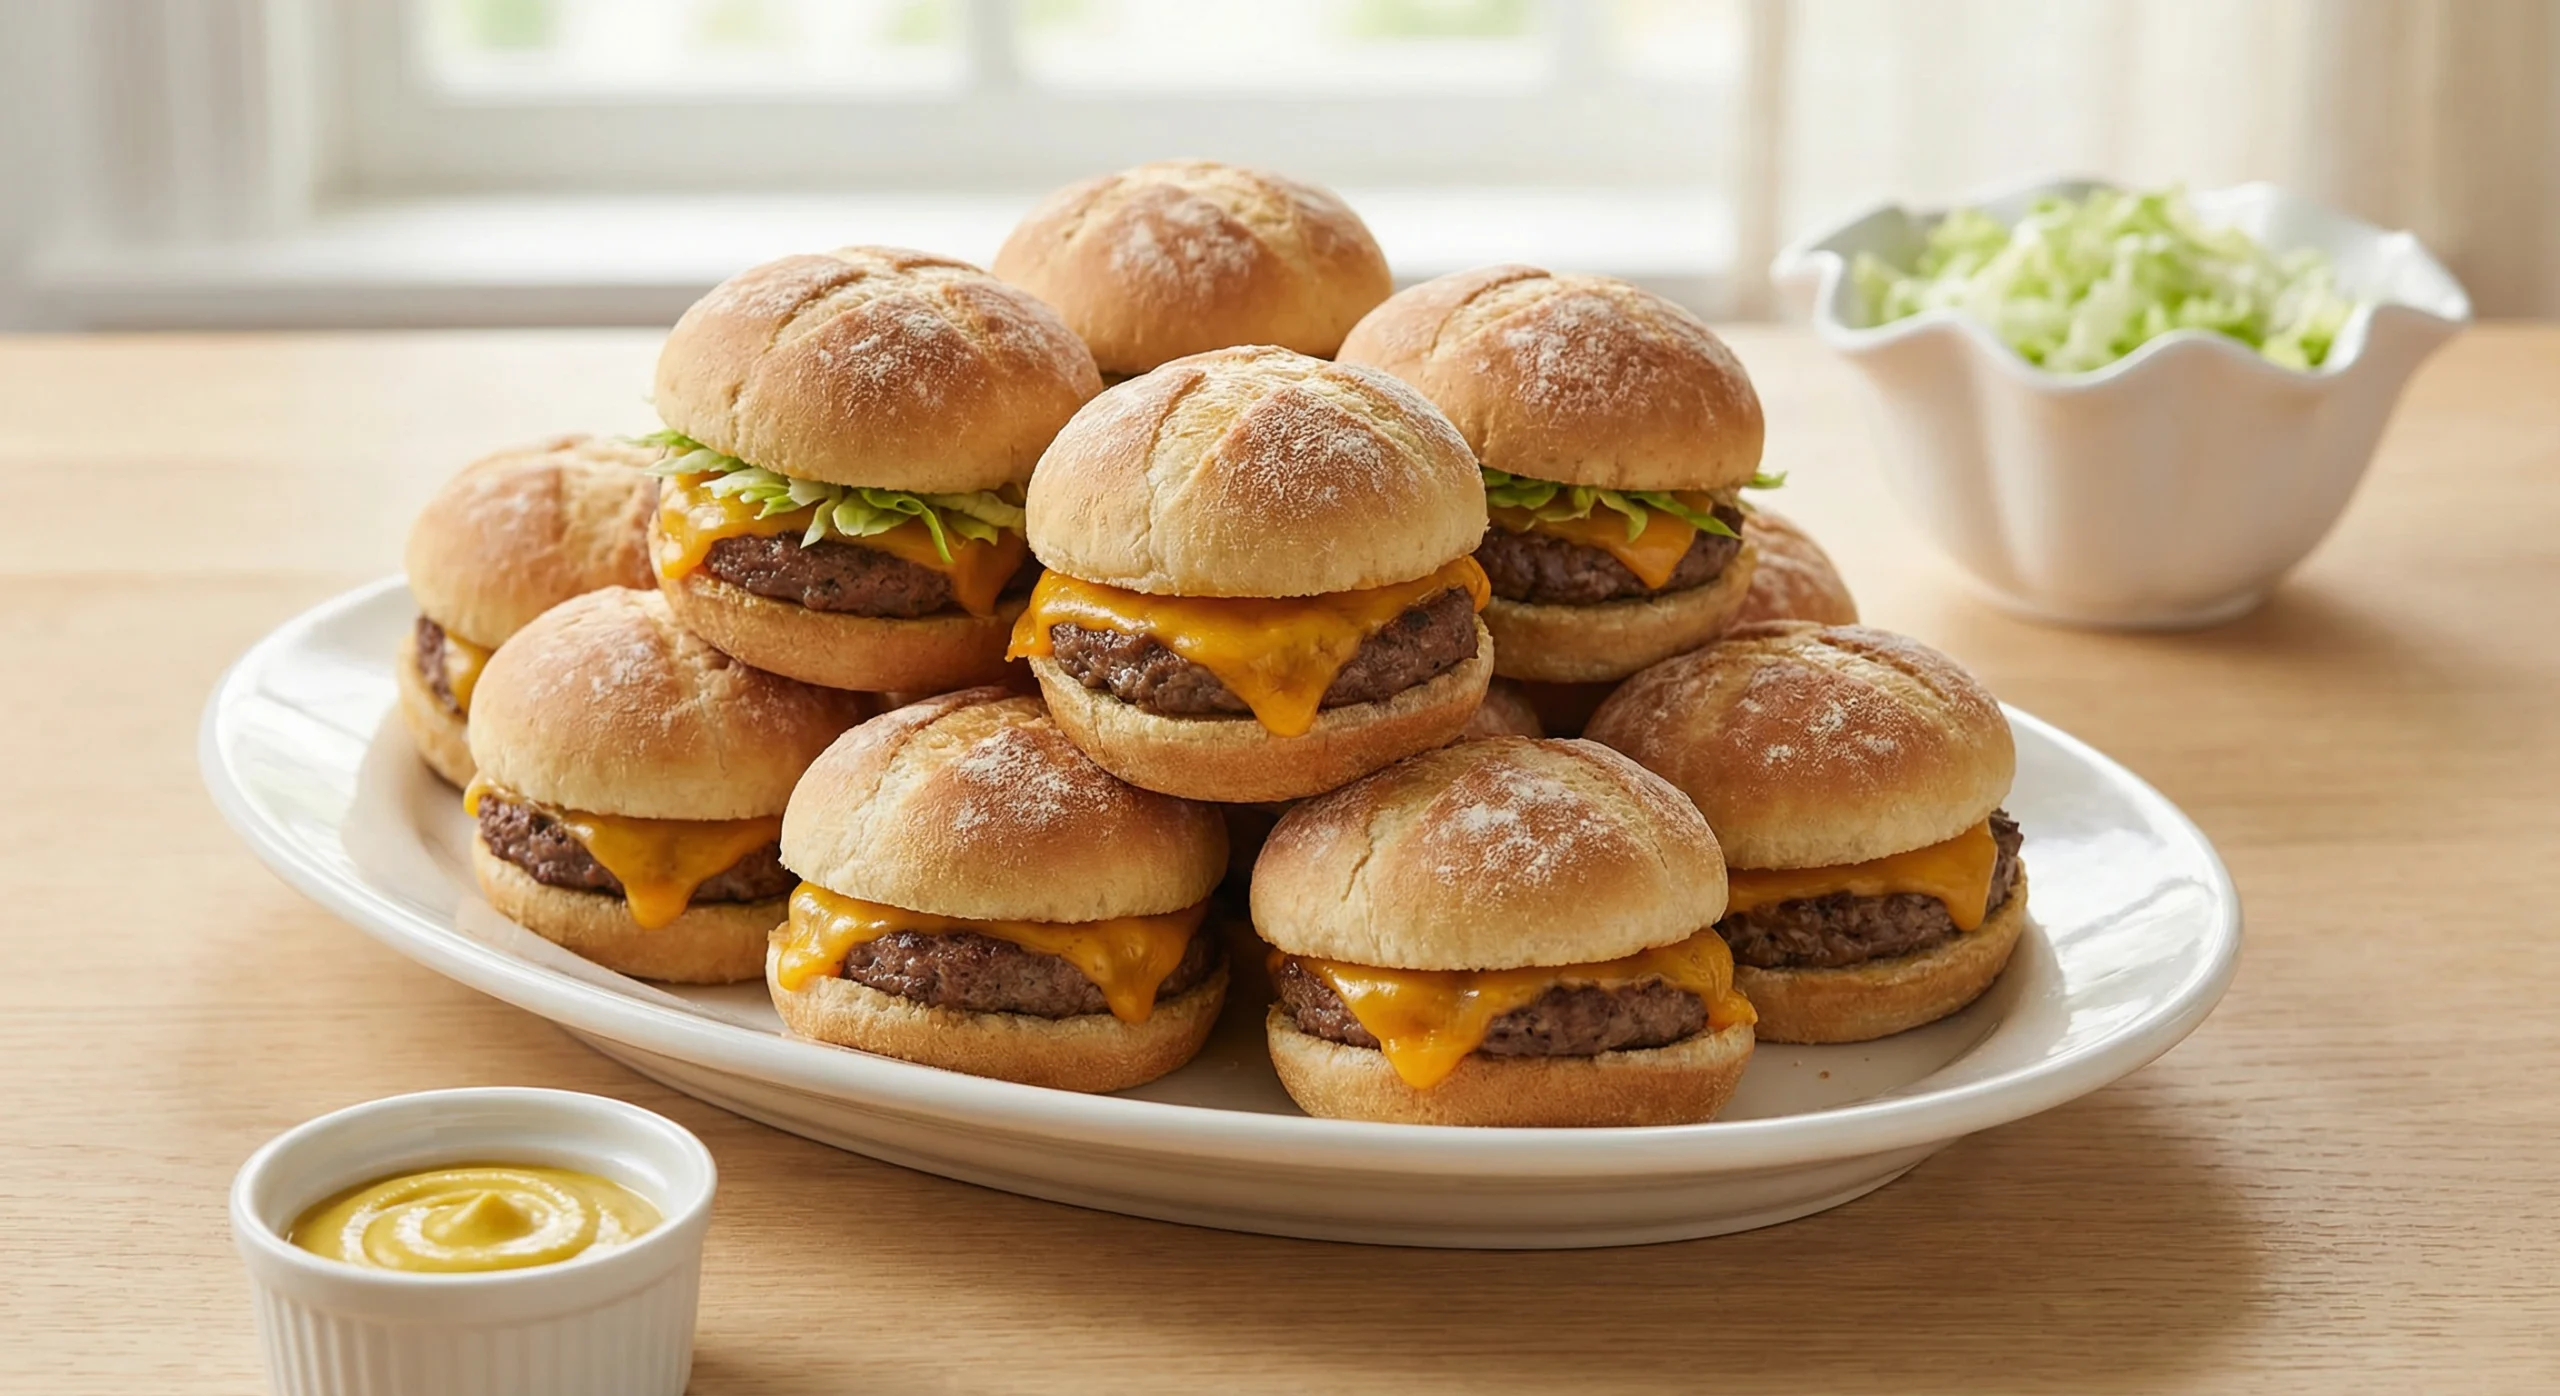
Semolina Cheeseburgers
Table of Contents
Tired of dense, crumbly burgers that turn into hockey pucks on the grill? You’re not alone. Most home cooks struggle with patties that either fall apart mid-flip or dry out before the cheese even melts.
These Semolina Cheeseburgers deliver a revelation: a tender, juicy interior with an irresistibly crispy, golden crust that holds together perfectly from grill to bun. The semolina flour doesn’t just bind the meat—it creates a light, almost creamy texture while adding a subtle nutty sweetness that amplifies the beef and cheese flavors.
As a recipe developer and culinary instructor who’s tested over 200 burger variations across grilling competitions and cooking classes, I’ve discovered that semolina is the game-changer missing from most backyard barbecues. Unlike breadcrumbs that soak up moisture or eggs that create density, semolina actually helps retain the meat’s natural juices while forming that crave-worthy exterior crust.
In this guide, we’ll explore everything from selecting the perfect fat-to-semolina ratio and choosing cheeses that complement the durum wheat flavor, to mastering the “chill-and-sear” technique that prevents your patties from swelling into meatballs. Whether you’re cooking for a weeknight family dinner or a weekend cookout, these Semolina Cheeseburgers will become your new signature dish.
Why This Semolina Cheeseburgers Recipe Works
This isn’t just another cheeseburger recipe—it’s a texture revolution. Here’s why Semolina Cheeseburgers deserve a permanent spot in your recipe collection:
Uses affordable, easy-to-find pantry staples – Durum wheat semolina costs pennies per serving and lasts indefinitely in your pantry, eliminating the need for expensive specialty binders or pre-made patty mixes.
Ready in 30 minutes with no lengthy marinades – Unlike traditional burgers that need resting time for flavor development, the semolina acts instantly to improve texture, allowing you to mix, form, and cook within half an hour.
Semolina creates a moisture-locking barrier – The coarse grains absorb excess fat and juices during cooking, then caramelize into a crispy shell while keeping the interior medium-rare juicy.
Versatile across proteins and cooking methods – Works beautifully with ground beef, lamb, turkey, or plant-based blends, and adapts to grilling, cast-iron searing, or even air-frying.
Perfect for weeknights or weekend feasts – Scales easily from a quick Tuesday dinner for two to a Saturday backyard party for twenty without increasing your active cooking time.
Ingredients & Prep: Building the Perfect Semolina Patty
The prep phase for Semolina Cheeseburgers requires a gentler touch than standard burgers. Semolina is hydrophilic—it wants to absorb moisture—so timing and technique matter.
Ingredients
DOUGH
- 275 ml water
- 20 g honey
- 9 g instant yeast
- 1 egg
- 600 g plain flour
- 9 g salt
- 50 g unsalted butter
COVERING
- Fine semolina
MINCED MEAT MIXTURE
- 700 g veal mince
- 4 g salt
- 3 g ground cumin
- 3 g onion powder
- 2 g cayenne pepper
- 2 g black pepper
- 75 g yellow onion
- 25 ml sunflower oil
EXTRAS
- Cheddar cheese
- Iceberg lettuce
- Sauce
Step-by-Step Cooking Instructions for Semolina Cheeseburgers
Step 1:
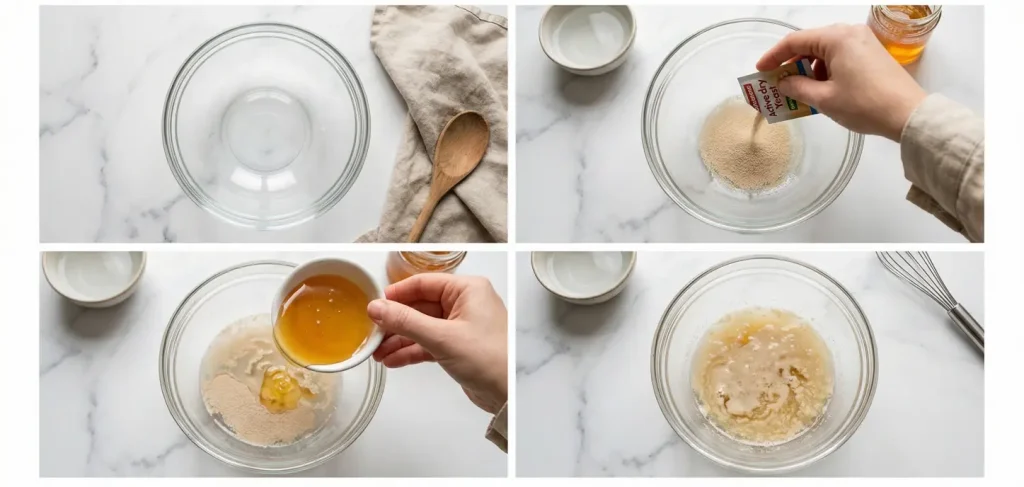
Place the lukewarm water, honey, and yeast in a deep bowl. Mix well and let it sit for 5 minutes.
Step 2:
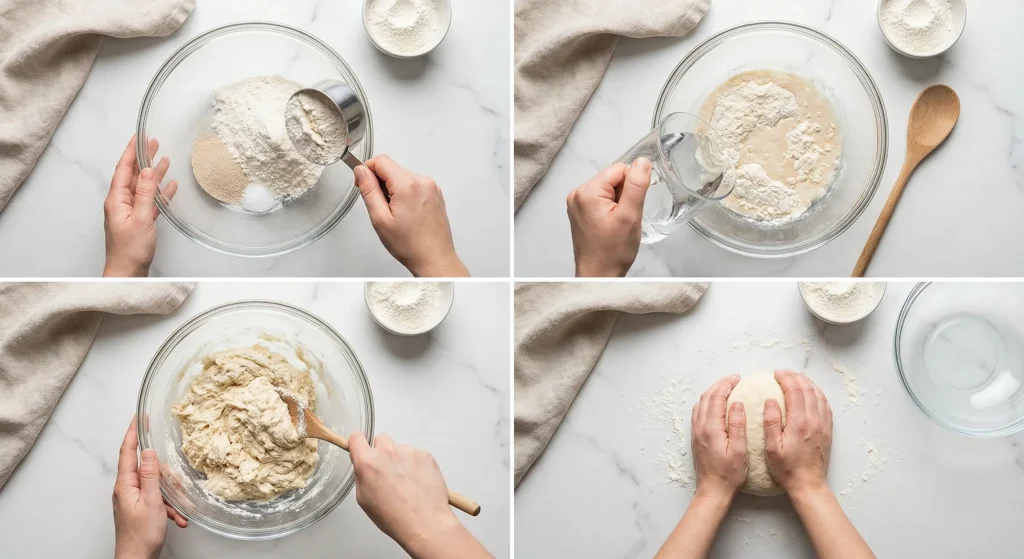
Add the beaten egg, flour, salt, and butter. Knead the mixture for 10-12 minutes until the dough comes together.
Step 3:
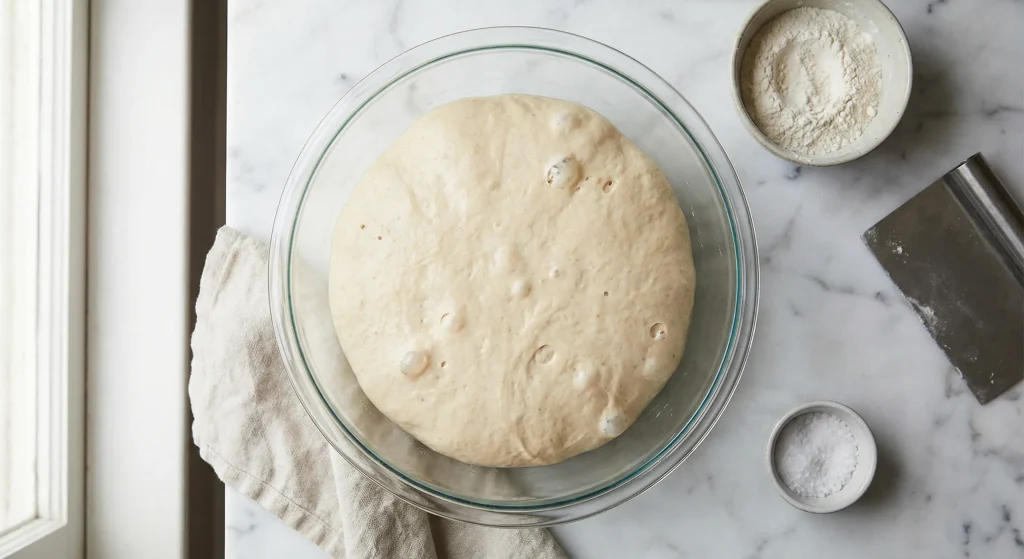
Cover the dough and let it rise for one hour.
Step 4:
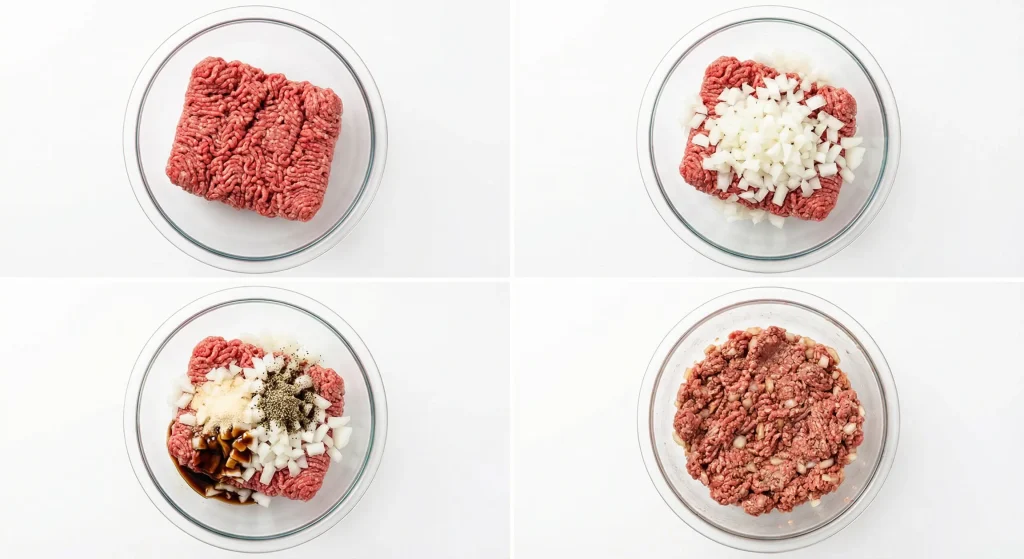
In a separate bowl, combine the ground meat with salt, cumin powder, onion powder, a pinch of chili powder, black pepper, chopped onion, and sunflower oil. Mix well until combined.
Step 5:
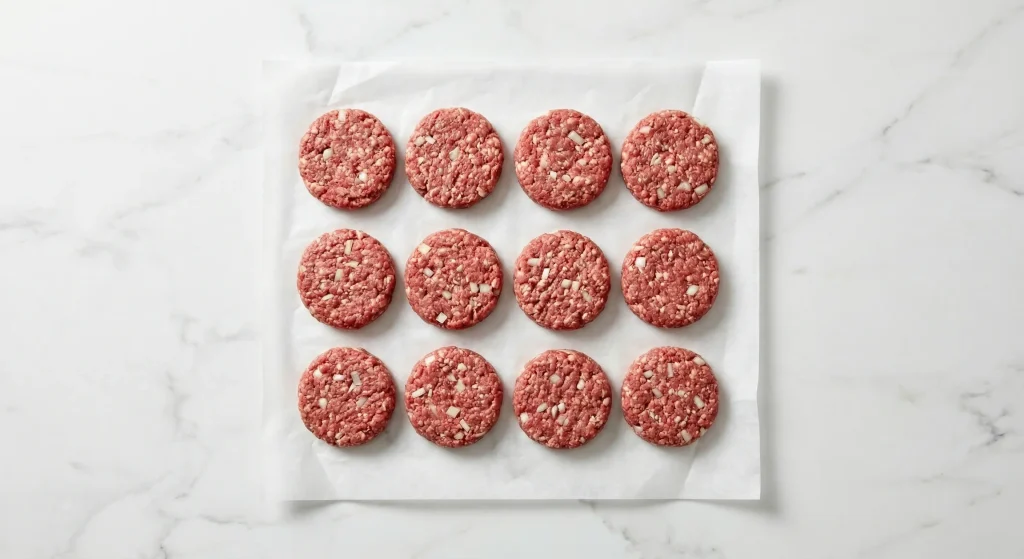
Take a portion of the ground meat mixture and flatten it into a disc. Make 20 discs and set them aside.
Step 6:
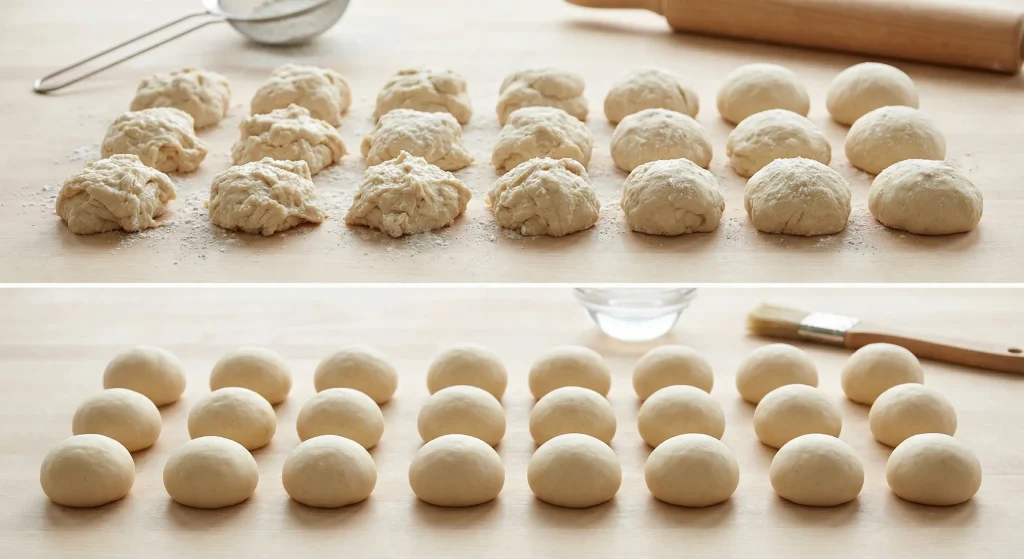
Press the risen dough to release the air, then divide it into 20 equal pieces and shape each into a ball.
Step 7:
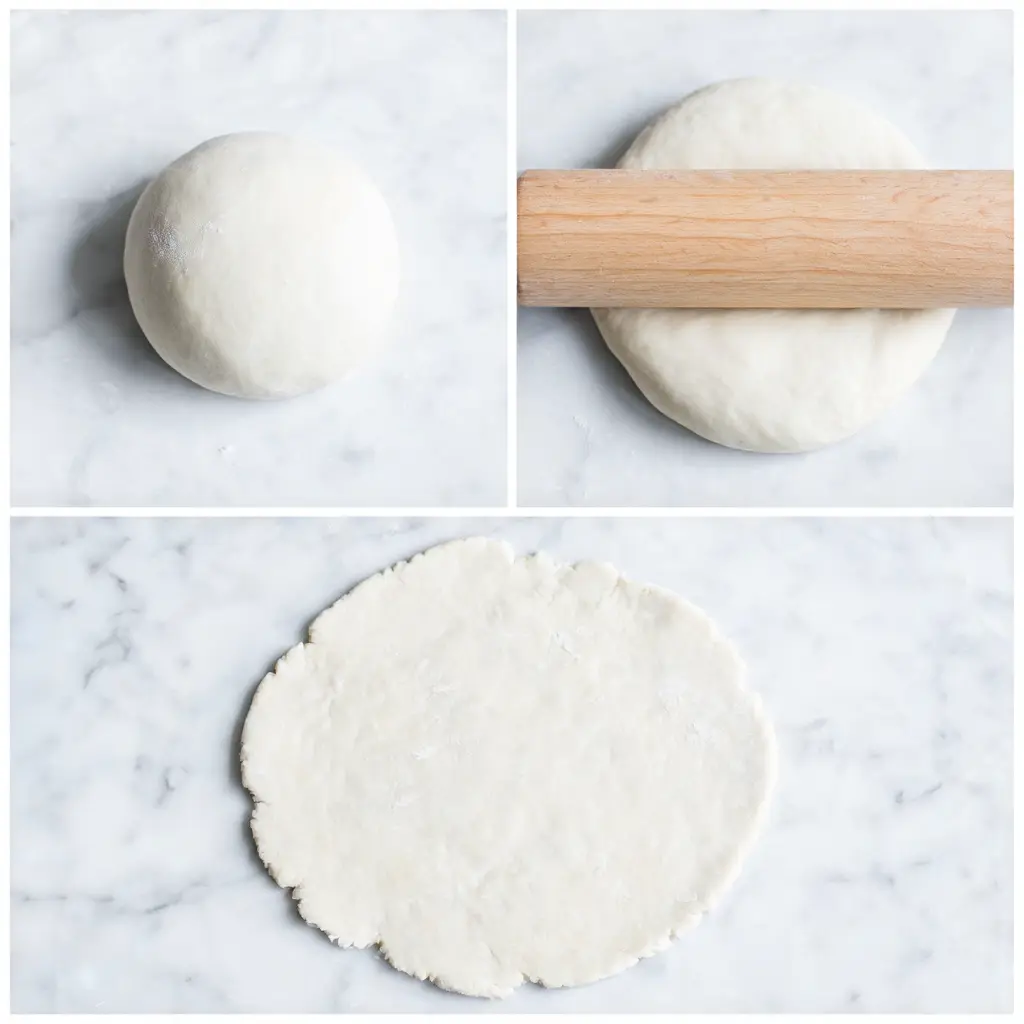
Take one ball of dough and gently roll it out using a rolling pin.
Step 8:
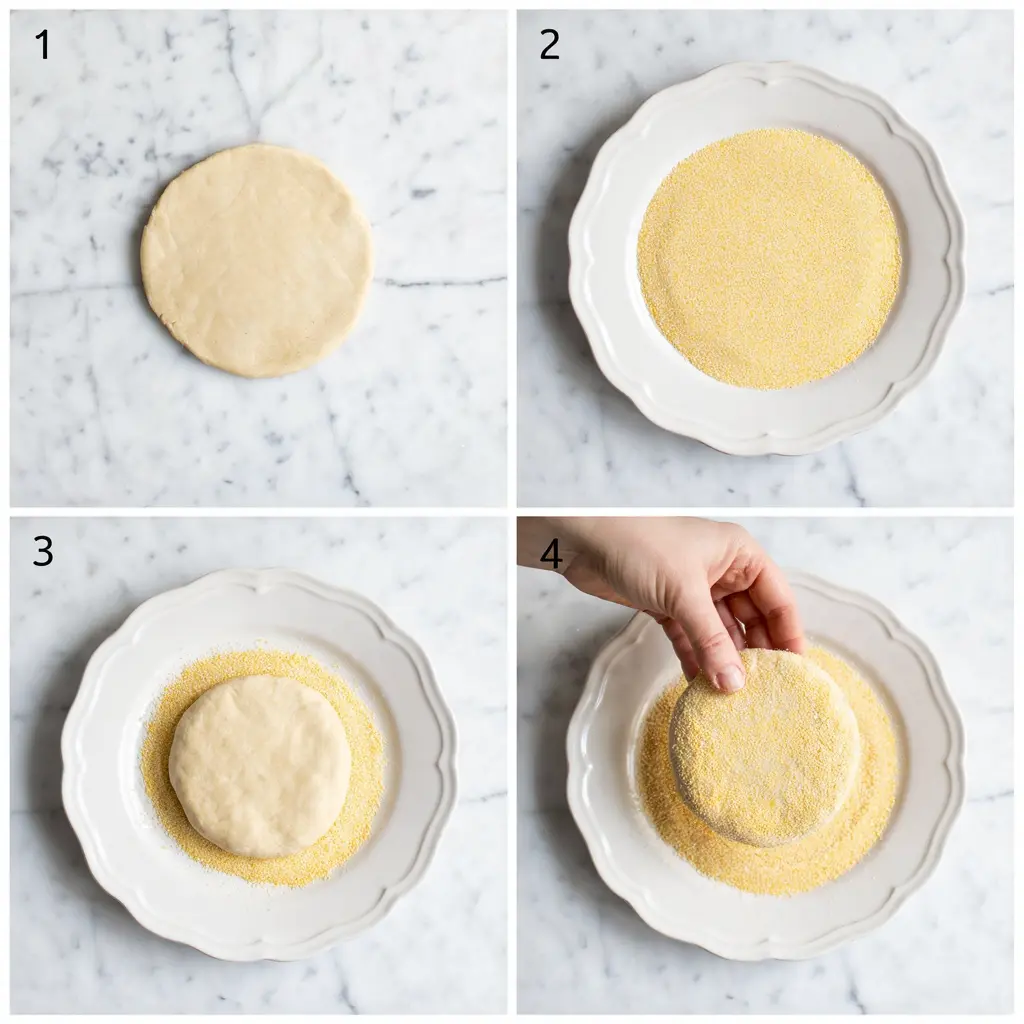
Roll the dough in fine semolina.
Step 9:
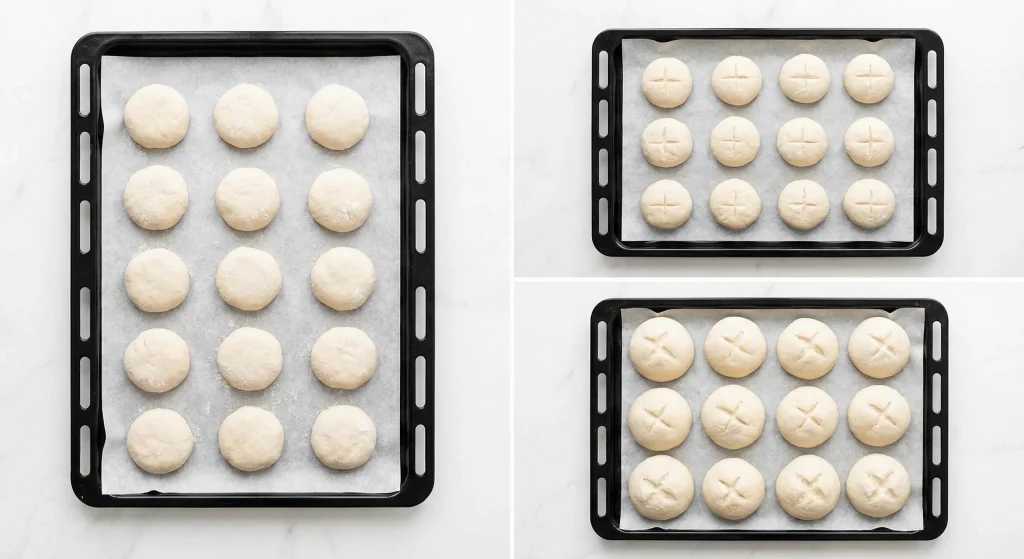
Arrange the rolls on a baking sheet lined with parchment paper. Make slits in the rolls with a sharp knife. Let the rolls rise for another 30 minutes, or until well puffed.
Step 10:
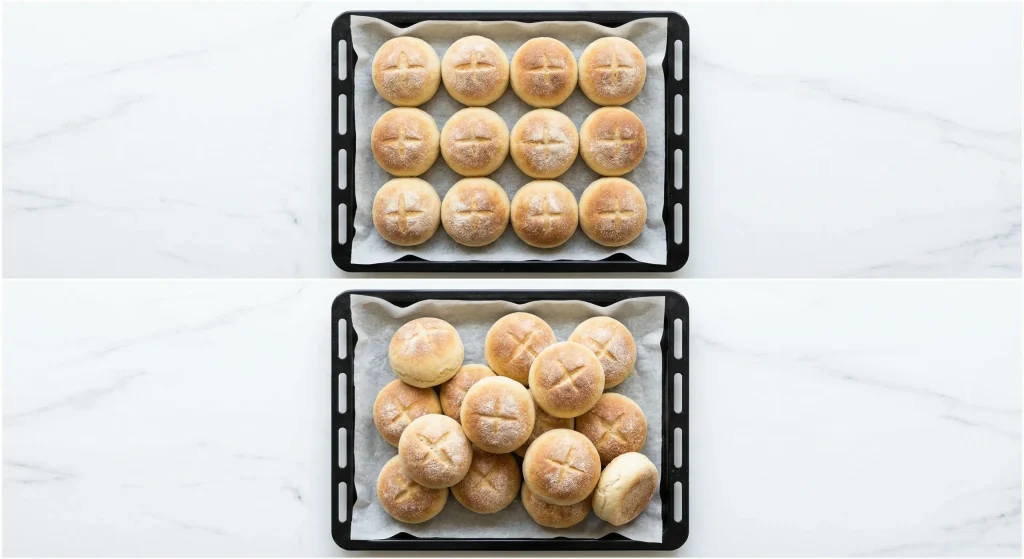
Preheat the oven to 200°C (400°F). Bake the rolls for 8-12 minutes, or until golden brown. Be mindful of baking time, as ovens vary.
Step 11:
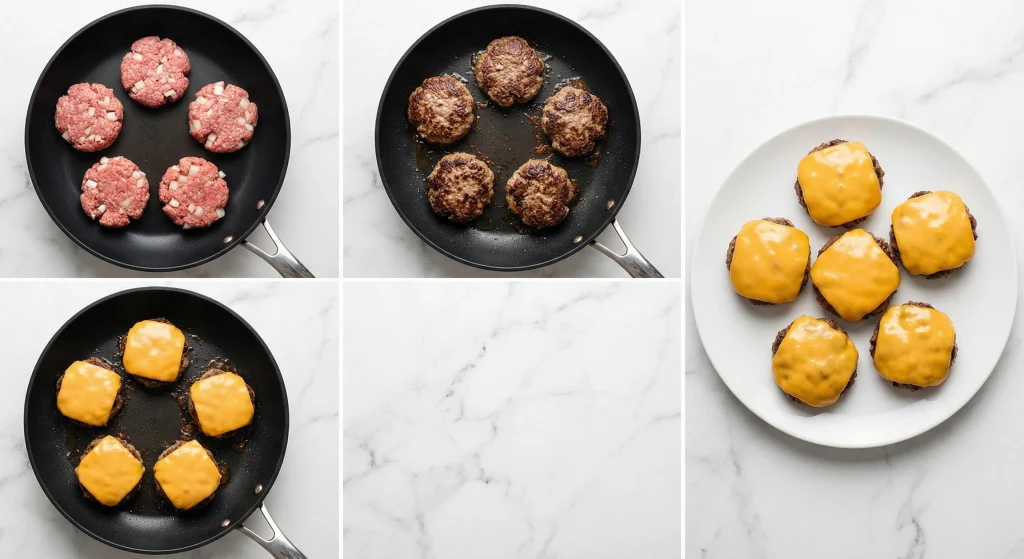
Meanwhile, cook the ground beef burgers in a skillet over medium heat until cooked through. Top with a slice of cheddar cheese, if desired, and let it melt.
Step 12:

Slit the rolls open and fill with the ground beef burgers, sauce, and fresh vegetables as desired.
FAQs: Semolina Cheeseburgers Edition
Can I use frozen ground meat for Semolina Cheeseburgers?
Yes, but thaw it completely in the refrigerator first. Partially frozen meat causes the semolina to clump unevenly, creating gritty pockets in your finished burgers.
Is semolina gluten-free?
No. Semolina is made from durum wheat, so these burgers contain gluten. For a gluten-free alternative using similar textural principles, substitute fine cornmeal or almond flour (though the cooking times and hydration levels will differ).
How do I fix overcooked Semolina Cheeseburgers?
If you’ve taken them too far, slice the patties and toss them into a quick pan sauce with beef broth and butter. The semolina will absorb the sauce and rehydrate, saving them as crumbles for pasta or rice bowls.
Is this recipe safe for pregnant women?
Semolina Cheeseburgers cooked to 160°F (well-done) are pregnancy-safe. The good news: due to the semolina’s moisture retention, well-done burgers still taste juicy rather than leather-like. Use pasteurized cheese varieties to be extra safe.
Can I bake Semolina Cheeseburgers instead of frying?
Yes. Place patties on a wire rack over a baking sheet at 425°F for 18-20 minutes. They won’t develop quite the same crust as pan-seared, but the semolina still provides excellent texture and binding.
Why did my patties fall apart?
You likely used too much semolina (stick to 3 tablespoons per pound) or didn’t chill the patties before cooking. The semolina needs those 15 minutes in the fridge to begin hydrating and binding to the meat proteins.