
Chocolate Balls in 15 Minutes: 3 Quick Methods That Work
Table of Contents
Tired of complicated dessert recipes that take hours to make? You’re craving something sweet, but the thought of spending your entire evening in the kitchen is enough to make you reach for store-bought treats instead. We’ve all been there—staring at elaborate truffle recipes with endless steps, special equipment, and ingredients you can’t pronounce.
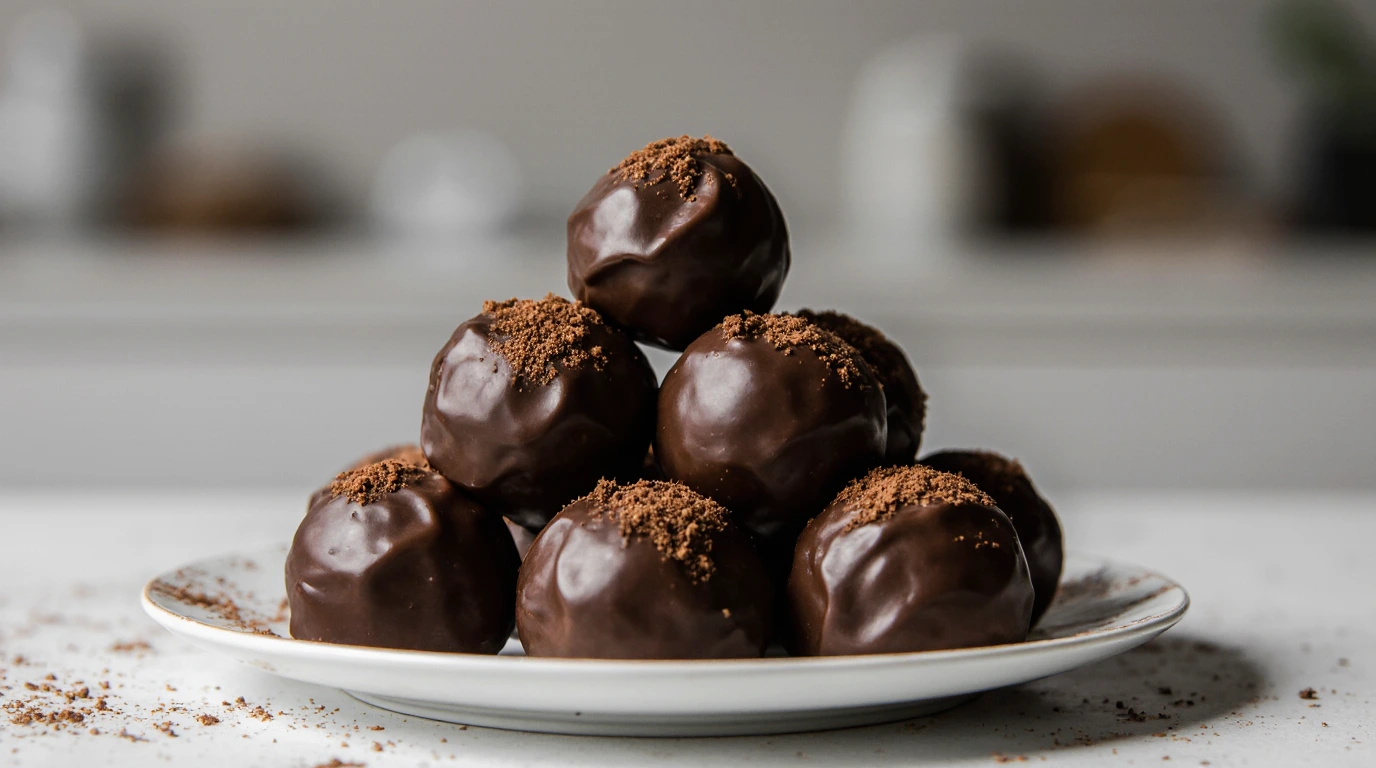
Here’s the good news: You can make incredible chocolate balls in just 15 minutes using simple ingredients you probably already have in your pantry. These aren’t those dry, crumbly energy balls or rock-hard truffles that crack your teeth. We’re talking about rich, decadent, melt-in-your-mouth chocolate balls that taste like they came from a fancy chocolate shop.
As a pastry chef and recipe developer for over 8 years, I’ve tested dozens of quick chocolate ball recipes in professional kitchens and home settings. I’ve learned exactly which shortcuts work and which ones compromise flavor and texture. These 3 methods have been perfected through countless batches and feedback from home cooks who needed fast, foolproof results.
In this guide, you’ll discover everything you need to know: how to choose the best chocolate for maximum flavor, the essential ingredients that create perfect texture every time, 3 tested methods that work in 15 minutes or less, pro tips to avoid common mistakes, creative flavor variations for every taste, and answers to your most frequently asked questions. Whether you need a last-minute dessert for guests, a quick snack for kids, or homemade gifts in a hurry, these methods deliver every single time.
Why This Chocolate Balls Recipe Works
These chocolate balls have become a go-to recipe for thousands of home cooks because they eliminate all the usual hassles while delivering outstanding results.
- Uses affordable, everyday ingredients found at any grocery store—no exotic chocolates or specialty items required
- Ready in 15 minutes flat from start to finish, including prep and chilling time
- No baking, no cooking, no special equipment needed—just a bowl and your hands
- Three different methods so you can choose based on what ingredients you have on hand
- Foolproof texture every time—never too soft, never too hard, always perfectly rollable
- Naturally customizable for dietary needs including gluten-free, dairy-free, and refined sugar-free options
- Perfect for any occasion—after-school snacks, party platters, holiday gifts, or midnight cravings
- Kid-friendly preparation that makes a fun cooking activity for little helpers
- Costs under $8 to make a full batch compared to $20+ for store-bought artisan truffles
- Stores beautifully for up to 2 weeks, so you can make them ahead without stress
The secret to these quick chocolate balls lies in the balance of ingredients. Each method uses a different base—cookies, dates, or condensed milk—that provides structure and sweetness while the chocolate delivers that rich, indulgent flavor. Unlike recipes that require tempering chocolate or precise candy-making techniques, these methods are forgiving and beginner-friendly.

Choosing the Right Chocolate
The type of chocolate you select dramatically impacts the flavor and texture of your chocolate balls. Let’s break down your options.
Best Chocolate Types for Each Method
For Method 1 (Cookie-Based): Semi-sweet or dark chocolate chips work perfectly. The 60% cacao content provides rich flavor without being too bitter, and chips melt smoothly into the mixture. Milk chocolate creates sweeter, creamier balls that kids especially love.
For Method 2 (Date-Based): Cocoa powder is your best friend here. Use natural unsweetened cocoa powder for deep chocolate flavor. Dutch-processed cocoa creates a smoother, less acidic taste but either works beautifully. High-quality cocoa makes a noticeable difference—look for brands like Ghirardelli or Valrhona.
For Method 3 (Condensed Milk-Based): Dark chocolate bars (70% cacao) create sophisticated, adult-friendly truffles. The condensed milk adds plenty of sweetness, so the dark chocolate balances perfectly. Avoid chocolate chips here—they contain stabilizers that prevent smooth melting.
Buying Tips for Quality Chocolate
Read the label carefully: Real chocolate lists cocoa butter as a main ingredient. Avoid products with vegetable oils or hydrogenated fats—these create waxy, artificial-tasting chocolate balls.
Check freshness: Chocolate should have a glossy appearance without white spots (called bloom). While bloom is safe to eat, it indicates the chocolate has been exposed to temperature changes and may not taste as good.
Consider fair trade and organic: These options often taste better because they’re made from higher-quality cacao beans. Plus, you’re supporting sustainable farming practices.
Smart Substitutions
Don’t have chocolate chips? Chop a chocolate bar into small pieces. This works perfectly and often tastes even better than chips.
Out of cocoa powder? Melt chocolate chips and let them cool slightly before mixing into date-based recipes. You’ll need about 1/2 cup melted chocolate to replace 1/3 cup cocoa powder.
Need dairy-free? Use dairy-free chocolate chips or dark chocolate (check labels—many dark chocolates are naturally dairy-free). For condensed milk recipes, swap in coconut condensed milk.
Want sugar-free? Sugar-free chocolate chips and monk fruit-sweetened chocolate work well, though the texture may be slightly less smooth.
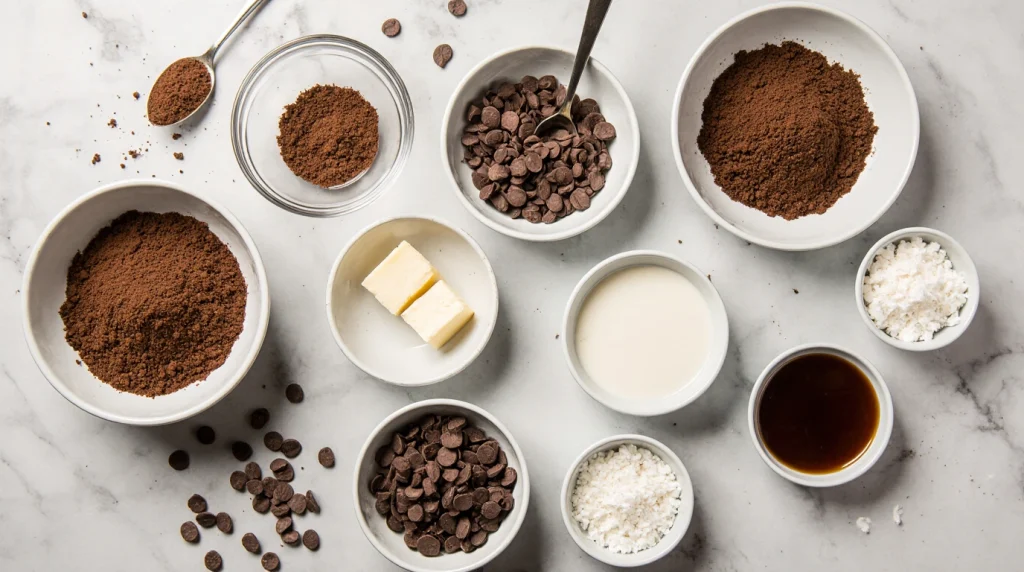
Ingredients & Prep
Having everything ready before you start ensures smooth, stress-free chocolate ball making. Here’s what you’ll need for each method.
Method 1: Cookie-Based Chocolate Balls
Ingredients:
- 2 cups chocolate sandwich cookies (like Oreos), finely crushed
- 4 oz cream cheese, softened to room temperature
- 1/2 cup semi-sweet chocolate chips, melted
- Optional coatings: cocoa powder, sprinkles, crushed cookies, shredded coconut
Prep work: Let cream cheese sit at room temperature for 30 minutes so it blends smoothly. Crush cookies in a food processor or place them in a sealed bag and crush with a rolling pin until they resemble fine crumbs.
Method 2: Date-Based Chocolate Balls (Energy Bites)
Ingredients:
- 1 1/2 cups pitted Medjool dates, packed
- 1/3 cup natural cocoa powder
- 1/4 cup almond butter or peanut butter
- 1/4 cup old-fashioned oats
- 2 tablespoons honey or maple syrup
- 1/4 teaspoon vanilla extract
- Pinch of salt
- Optional add-ins: mini chocolate chips, chopped nuts, chia seeds
Prep work: If your dates are dry or hard, soak them in warm water for 10 minutes, then drain and pat dry. This makes them easier to blend. Measure all ingredients before starting since this method moves quickly.
Method 3: Condensed Milk Chocolate Balls (Quick Truffles)
Ingredients:
- 8 oz dark chocolate (70% cacao), chopped
- 1/2 cup sweetened condensed milk
- 1 teaspoon vanilla extract
- Pinch of salt
- Coatings: cocoa powder, powdered sugar, finely chopped nuts, or sprinkles
Prep work: Chop chocolate into small, uniform pieces so it melts evenly. Have your coatings ready in shallow bowls since you’ll need to roll the balls immediately after forming them.
Universal Pantry Staples
Keep these items stocked for spontaneous chocolate ball making:
- Quality cocoa powder (natural or Dutch-processed)
- Vanilla extract (pure, not imitation)
- Sea salt or kosher salt (enhances chocolate flavor)
- Coconut oil (helps achieve smooth, glossy texture)
- Nut butters (almond, peanut, or cashew for binding)
Essential Tools
- Food processor or high-powered blender (for date-based method)
- Mixing bowls in various sizes
- Cookie scoop or tablespoon for portion control
- Parchment paper or silicone baking mat
- Airtight storage container
- Optional: candy thermometer for precision (though not necessary)
Step-by-Step Instructions for All 3 Methods
Each method takes 15 minutes or less and produces approximately 20-24 chocolate balls. Choose the method that fits your ingredients and preferences.
Method 1: Cookie-Based Chocolate Balls (No-Bake Oreo Truffles)
Step 1: Mix the Base In a large bowl, combine crushed chocolate sandwich cookies and softened cream cheese. Mix with a fork or your hands until the mixture holds together when squeezed. It should look like moist, dark sand. If too dry, add another tablespoon of cream cheese.
Step 2: Form and Chill Scoop tablespoon-sized portions and roll into smooth balls between your palms. Place on a parchment-lined plate or baking sheet. Pop them in the freezer for exactly 5 minutes—this firms them up for easy coating.
Step 3: Coat and Finish Melt chocolate chips in the microwave in 30-second bursts, stirring between each, until smooth. Remove balls from freezer. Using a fork, dip each ball into melted chocolate, tap off excess, and place back on parchment. Immediately roll in your chosen coating before the chocolate sets. Let sit at room temperature for 5 minutes to set completely.
Total time: 12-15 minutes
Method 2: Date-Based Chocolate Balls (Healthy Energy Bites)
Step 1: Blend the Base Add dates, cocoa powder, nut butter, oats, honey, vanilla, and salt to your food processor. Pulse 15-20 times, then process continuously for 30-60 seconds. Scrape down sides as needed. The mixture should stick together when pinched and look like a thick, sticky dough.
Step 2: Taste and Adjust This is your chance to customize. Taste the mixture (yes, really—it’s safe!). Want more chocolate? Add 1-2 tablespoons more cocoa. Too dry? Add another tablespoon of nut butter or honey. Process briefly to incorporate.
Step 3: Roll and Store Using slightly damp hands (prevents sticking), scoop tablespoon-sized portions and roll into balls. Press firmly—the natural sugars in dates act as a binder. If desired, roll in cocoa powder, shredded coconut, or crushed nuts. These are ready to eat immediately or store.
Total time: 8-10 minutes
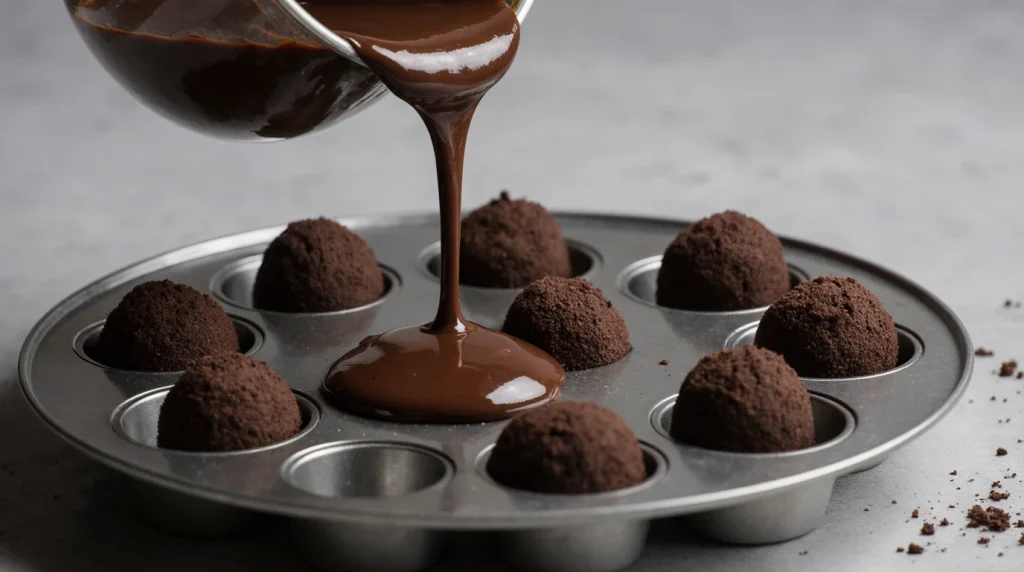
Method 3: Condensed Milk Chocolate Balls (Quick Ganache Truffles)
Step 1: Create Ganache Base Place chopped chocolate in a microwave-safe bowl. Heat in 30-second intervals, stirring between each, until 75% melted. Add condensed milk, vanilla, and salt. Stir vigorously until completely smooth and glossy. The residual heat will melt any remaining chocolate chunks.
Step 2: Quick Chill Spread the mixture onto a parchment-lined plate in a thin layer (about 1/2 inch thick). Place in the freezer for exactly 7-8 minutes. It should be firm enough to scoop but not rock-hard. If you over-chill, let sit at room temperature for 2-3 minutes.
Step 3: Shape and Coat Working quickly, scoop teaspoon-sized portions and roll into balls. Your hands will get messy—this is normal! Roll immediately in your coating of choice (cocoa powder works best for this method). The coating prevents the chocolate from sticking to your hands and adds flavor.
Total time: 15 minutes
Universal Success Tips
Temperature matters: Work in a cool kitchen (ideally below 72°F). Warm hands melt chocolate balls quickly. If your hands are warm, run them under cold water and dry thoroughly before rolling.
Portion consistency: Use a cookie scoop or measuring spoon to ensure uniform size. This makes them look professional and ensures even coating coverage.
Don’t skip the freeze: Those few minutes in the freezer make the difference between messy, falling-apart balls and perfect, smooth spheres.
Pro Tips for Perfect Chocolate Balls
Master these professional techniques to elevate your chocolate balls from good to extraordinary.
Avoiding Common Texture Problems
Too soft and won’t hold shape: This usually means too much liquid or not enough binder. For cookie-based balls, add 2-3 more tablespoons of crushed cookies. For date-based balls, add 1-2 tablespoons more oats or a tablespoon of ground flaxseed. For condensed milk balls, add 1-2 ounces more chocolate.
Too dry and crumbly: Add more of your wet ingredient gradually. For cookie balls, add cream cheese by the teaspoon. For date balls, add nut butter or a splash of water. For condensed milk truffles, add 1-2 tablespoons more condensed milk.
Coating won’t stick: The chocolate balls must be slightly sticky for coatings to adhere. If you’ve refrigerated them too long, let them sit at room temperature for 5 minutes. Alternatively, brush each ball lightly with water before rolling in dry coatings.
Melting while rolling: Your hands are too warm. Chill them frequently in ice water and dry thoroughly. Work with only 4-5 balls at a time, keeping the rest refrigerated. Consider wearing food-safe gloves.
Tool Recommendations
A cookie scoop (1-tablespoon size) ensures uniform portions and speeds up the process dramatically. A food processor makes date-based balls effortless—don’t try substituting a regular blender as dates will gum up the blades.
For coating, small shallow bowls work better than plates. You can roll balls more efficiently and use less coating material. Parchment paper is superior to wax paper—it doesn’t stick and makes cleanup instant.
Storage and Shelf Life
Room temperature: Cookie-based and condensed milk chocolate balls keep for 5-7 days in an airtight container in a cool, dry place. Date-based balls last 7-10 days.
Refrigerated: All three types last 2 weeks when refrigerated. Let come to room temperature for 10 minutes before serving for best texture and flavor.
Frozen: Chocolate balls freeze beautifully for up to 3 months. Place in a single layer on a baking sheet to freeze solid (1-2 hours), then transfer to freezer bags. Thaw in the refrigerator overnight or at room temperature for 20-30 minutes.
Pro freezer tip: Freeze chocolate balls in portioned containers. Grab just what you need for lunchboxes or quick snacks without thawing the entire batch.
Gift-Giving Excellence
Present chocolate balls in clear cellophane bags tied with ribbon, mini cupcake liners in decorative boxes, or mason jars layered with parchment between each layer. Add a tag noting storage instructions and “best by” dates for a professional touch.
Flavor Variations
Transform your basic chocolate balls into dozens of unique treats with these creative variations.
Decadent Dessert Flavors
Peppermint Chocolate Balls: Add 1/4 teaspoon peppermint extract to any base recipe. Roll finished balls in crushed candy canes or peppermint candies. Perfect for the holiday season.
Espresso Chocolate Balls: Mix 1 tablespoon instant espresso powder into your chocolate mixture. Roll in cocoa powder mixed with finely ground coffee. These adult-friendly treats pair beautifully with after-dinner coffee.
Salted Caramel Chocolate Balls: Add 2 tablespoons caramel sauce to cookie-based method. Roll in a mixture of cocoa powder and flaky sea salt. The sweet-salty combination is addictive.
Orange Chocolate Balls: Add 1 teaspoon orange zest and 1/4 teaspoon orange extract to condensed milk method. Roll in cocoa powder or finely chopped candied orange peel.
Healthy and Dietary-Friendly Options
Keto Chocolate Balls: Use sugar-free chocolate, replace dates with almond flour and sugar-free syrup in Method 2. Use cream cheese and butter in place of condensed milk for Method 3. Each ball contains only 2-3g net carbs.
Paleo Chocolate Balls: Stick with Method 2 (date-based) using almond butter, pure cocoa powder, and honey. Add coconut flakes for texture. These are naturally Paleo-compliant.
Vegan Chocolate Balls: Use dairy-free cream cheese for Method 1, or stick with Method 2 which is naturally vegan. For Method 3, replace condensed milk with coconut condensed milk.
Protein-Packed Chocolate Balls: Add 1/4 cup chocolate protein powder to any recipe. You may need to add 1-2 tablespoons more liquid. Great for post-workout snacks.
International Flavor Inspirations
Mexican Chocolate Balls: Add 1/2 teaspoon cinnamon and 1/8 teaspoon cayenne pepper to the base. Roll in a cinnamon-sugar mixture. The subtle heat enhances the chocolate flavor.
Italian Amaretto Balls: Soak crushed amaretti cookies in 2 tablespoons amaretto liqueur, then proceed with Method 1. Roll in sliced almonds. These taste like sophisticated Italian confections.
Middle Eastern Cardamom Chocolate Balls: Add 1/2 teaspoon ground cardamom and 2 tablespoons tahini to Method 2. Roll in crushed pistachios. The aromatic spice creates an exotic flavor profile.
German Coconut Chocolate Balls: Mix 1/2 cup shredded coconut into Method 1. Roll in additional toasted coconut. These remind you of classic Bounty bars.
Kid-Friendly Fun Variations
Birthday Cake Chocolate Balls: Mix rainbow sprinkles throughout the base and roll in more sprinkles. Add 1/4 teaspoon cake batter extract for authentic birthday cake flavor.
Cookies and Cream: Use half chocolate cookies and half vanilla cookies in Method 1. Roll in crushed vanilla cookies for contrast.
Peanut Butter Cup Balls: Add 3 tablespoons peanut butter to any chocolate base. Place a mini peanut butter cup in the center before rolling into balls.
Serving Suggestions
Present your chocolate balls in ways that maximize their appeal for any occasion.
Perfect Pairings for Every Event
Coffee and Tea Time: Serve 2-3 chocolate balls alongside espresso, cappuccino, or hot chocolate. The rich chocolate complements coffee’s bitterness beautifully. For tea lovers, pair with Earl Grey or chai—the aromatic spices enhance chocolate notes.
Dessert Platters: Arrange chocolate balls with fresh strawberries, sliced bananas, and raspberries. Add cheese cubes (try aged cheddar or brie with dark chocolate balls) and mixed nuts for a sophisticated dessert board.
Kids’ Parties: Create a chocolate ball “sundae bar” with various coatings in small bowls. Let kids roll pre-made balls in their favorite toppings. Serve with cold milk or chocolate milk.
Holiday Gatherings: Present chocolate balls in vintage tins or decorative boxes lined with tissue paper. Mix different coatings on one platter for visual variety—cocoa powder, crushed candy canes, gold sprinkles, and chopped nuts.
Beverage Pairings
Wine: Dark chocolate balls pair exceptionally with Port, Cabernet Sauvignon, or Merlot. The tannins in red wine balance chocolate’s richness. Milk chocolate balls complement sweeter wines like Moscato or Riesling.
Spirits: Serve espresso chocolate balls with Bailey’s Irish Cream or Kahlúa. Orange chocolate balls pair beautifully with Grand Marnier. Peppermint balls complement peppermint schnapps for adult holiday parties.
Non-alcoholic: Beyond coffee and tea, try chocolate balls with cold almond milk, coconut water (for date-based balls), or sparkling water with lemon to cleanse the palate between bites.
Creative Presentation Ideas
Individual Servings: Place 2-3 chocolate balls in mini cupcake liners or small paper cups. Arrange on a tiered serving stand for elegant height and visual interest.
Mason Jar Gifts: Layer different varieties of chocolate balls in mason jars with parchment paper between layers. Tie with ribbon and attach a tag listing flavors and storage instructions.
Dessert Skewers: Thread chocolate balls onto small wooden skewers alternating with fresh fruit like strawberries or pineapple chunks. Serve standing upright in a tall glass.
Chocolate Ball “Cake”: Stack chocolate balls in a pyramid shape on a cake stand, securing with small amounts of melted chocolate. Dust the entire creation with powdered sugar and top with fresh mint leaves.
FAQs
Can I use frozen chocolate for making chocolate balls?
Yes, frozen chocolate works perfectly. In fact, keeping chocolate chips in the freezer prevents them from developing bloom and extends their shelf life. Frozen chocolate may take 10-15 seconds longer to melt, but the results are identical to room-temperature chocolate. For chopped chocolate bars, let them sit at room temperature for 5 minutes before chopping—frozen chocolate is brittle and creates uneven pieces.
How do I fix chocolate balls that turned out too soft?
If your chocolate balls won’t hold shape, place them in the refrigerator for 30 minutes to firm up, then add a binding agent. For cookie-based balls, roll them in crushed cookies or graham cracker crumbs and reshape. For date-based balls, knead in 2-3 tablespoons more oats or ground nuts. For condensed milk balls, melt them down, add 2 ounces more chopped chocolate, re-chill, and reshape.
Are chocolate balls safe for pregnant women?
Yes, all three methods are safe during pregnancy when made with fresh, properly stored ingredients. The recipes contain no raw eggs, unpasteurized dairy, or high-mercury ingredients. However, if using alcohol extracts or liqueurs in variations, be aware that most of the alcohol remains since there’s no baking to evaporate it. Stick with vanilla extract or non-alcoholic flavorings, or choose date-based balls which are naturally the healthiest option.
Can I make chocolate balls without a food processor?
Absolutely! For Method 1 (cookie-based), crush cookies in a sealed plastic bag with a rolling pin—it takes 2 minutes of vigorous smashing. Mix with a fork or clean hands. For Method 2 (date-based), chop dates very finely with a sharp knife, then mash everything together with a sturdy fork. It requires more elbow grease but works perfectly. Method 3 needs no processor at all—just chopping and stirring.
How long do homemade chocolate balls stay fresh?
Storage life depends on ingredients and storage method. Cookie-based and condensed milk chocolate balls last 5-7 days at room temperature, 2 weeks refrigerated, or 3 months frozen. Date-based balls are most shelf-stable, lasting 10 days at room temperature, 3 weeks refrigerated, or 4 months frozen. Always store in airtight containers. If they contain fresh cream cheese, refrigerate within 2 hours of making them.
Can kids help make chocolate balls?
Definitely! Chocolate balls are perfect for kids ages 4 and up with supervision. Children can help crush cookies, measure ingredients, press buttons on the food processor (with adult oversight), and especially love rolling the balls and coating them. The no-bake aspect means no burn risks. Have kids wash hands thoroughly before starting, and provide wet wipes for easy cleanup since chocolate gets everywhere.
Why did my chocolate seize up and turn grainy?
Chocolate seizes when it comes into contact with water or steam. Even a single drop can cause the entire batch to become thick and grainy. If this happens, you can sometimes save it by adding 1 tablespoon of warm cream or coconut oil per ounce of chocolate and stirring vigorously. Prevention tips: ensure all bowls and utensils are completely dry, don’t cover hot chocolate (condensation drips back in), and avoid overheating which causes similar grainy texture.
What’s the best way to transport chocolate balls to a party?
Use a rigid container with a lid—plastic storage containers work better than paper boxes which can get crushed. Line the bottom with parchment paper and place chocolate balls in a single layer. If stacking is necessary, place parchment between layers. Transport in a cooler with ice packs if it’s warm outside (above 75°F). Chocolate balls can sit at room temperature during the party for up to 4 hours. For longer events, keep reserves refrigerated and replenish as needed.
Conclusion
You’ve just discovered that impressive, delicious chocolate balls don’t require hours of work, professional training, or expensive ingredients. With these 3 quick methods, you’re equipped to create homemade treats that rival anything from a chocolate shop—and you can do it in just 15 minutes.
Whether you’re drawn to the rich indulgence of cookie-based chocolate balls, the wholesome energy of date-based bites, or the sophisticated elegance of condensed milk truffles, you now have foolproof techniques that work every single time. These aren’t just recipes—they’re solutions for busy weeknights, last-minute party needs, thoughtful homemade gifts, and those moments when only chocolate will do.
Ready to experience how easy homemade chocolate really is? Grab your ingredients, pick your favorite method, and give yourself 15 minutes. You’ll be amazed at what you can create. Your family, friends, and taste buds will thank you.
Join over 5,000 home cooks who’ve already fallen in love with these quick chocolate ball recipes! Share your creations with us on social media—we love seeing which method you choose and how you customize them.
Craving more easy chocolate recipes? Don’t miss our [No-Bake Chocolate Desserts Guide] for 10 additional treats that require zero oven time. Looking for gift ideas? Check out our [Homemade Food Gifts in Under 30 Minutes] for more impressive treats that come together fast. And if you loved the date-based method, explore our [Complete Guide to Energy Bites] for 15 healthy variations that fuel your day.
Happy chocolate ball making—may your kitchen always smell like chocolate and your dessert needs always be met in 15 minutes or less!