
Chicken Tenders in 20 Minutes: Quick and Easy Recipe
Table of Contents
Tired of spending an hour in the kitchen just to serve dinner? Busy weeknights demand quick solutions, but you shouldn’t have to sacrifice flavor or quality for speed. Most chicken tender recipes either take too long or produce dry, flavorless results that leave your family reaching for the ketchup bottle to mask the blandness.
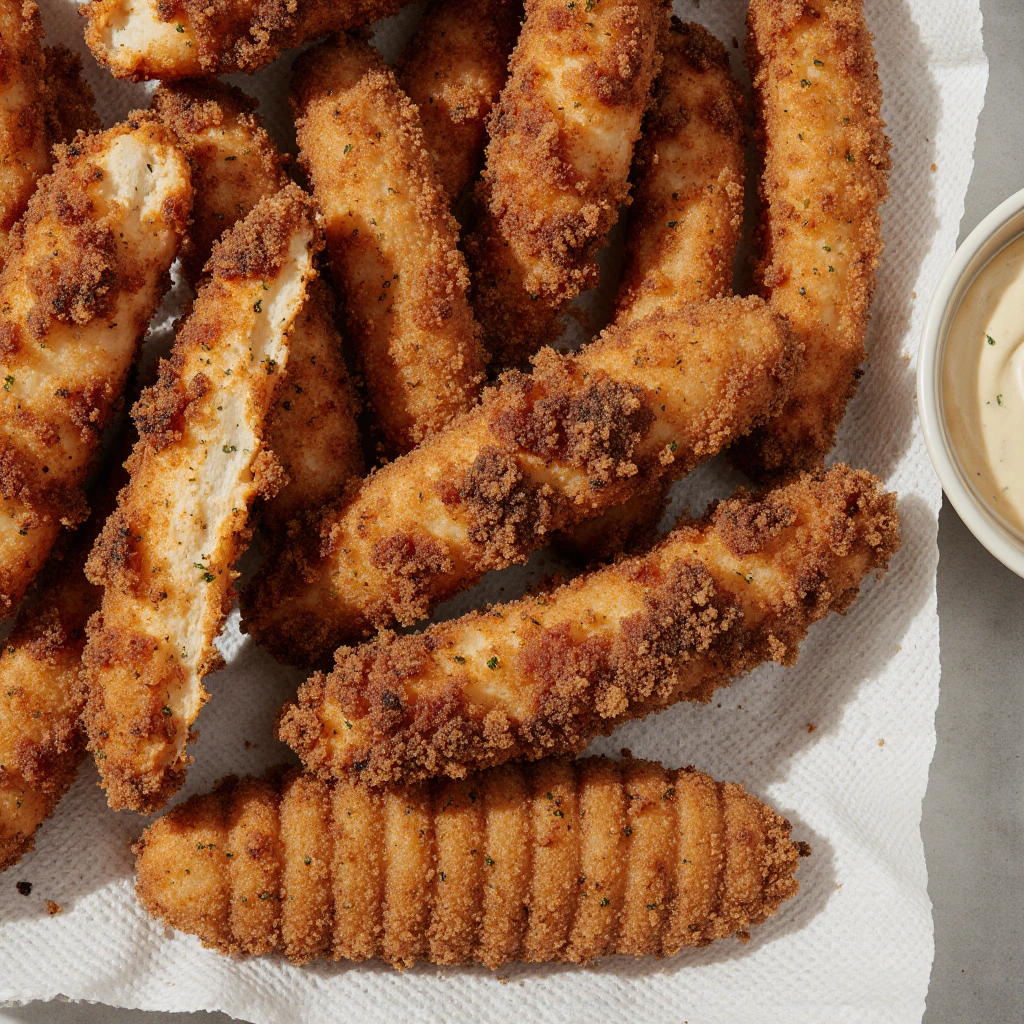
This Chicken Tenders recipe delivers golden, crispy perfection with juicy, tender meat inside—all in just 20 minutes from start to finish. You’ll get restaurant-quality results with a satisfying crunch that rivals your favorite fast-food chain, but with ingredients you can actually pronounce and flavors you can customize to your family’s preferences.
As a professional chef who’s worked in fast-casual kitchens for over 8 years, I’ve perfected the art of quick, high-quality chicken preparation. I’ve cooked thousands of pounds of chicken tenders and learned exactly what techniques produce consistently excellent results under time pressure. This recipe incorporates all those professional tricks into a streamlined home-cooking method.
In this guide, you’ll discover how to select the best chicken for tender results, essential prep techniques that maximize flavor while minimizing effort, foolproof breading methods that stay crispy, and cooking tips that guarantee juicy chicken every single time. Plus, I’ll answer your most common questions about making perfect Chicken Tenders at home.
Why This Chicken Tenders Recipe Works
This recipe has become a weeknight staple for busy families because it solves real dinner-time challenges:
- Uses affordable chicken breast that’s available at every grocery store and costs less than $3 per pound on average
- Ready in just 20 minutes including prep and cooking time, making it faster than ordering delivery or driving through a restaurant
- Requires minimal ingredients with just 6 basic pantry staples plus chicken—no special shopping trips needed
- Creates authentic crispy coating using a simple three-step breading process that produces restaurant-quality crunch
- Delivers juicy, never-dry chicken through proper cooking temperature and timing that prevents the overcooking problem
- Perfect for meal prep since you can double the batch and refrigerate or freeze extras for quick future meals
- Kid-approved every time with mild, customizable flavors that even picky eaters request again and again
- Versatile for any occasion working equally well for quick weeknight dinners, game-day snacks, or entertaining guests
Choosing the Right Chicken
Best Chicken Cuts for Tender Results
Chicken breast tenderloins, also called chicken tenders or chicken strips, are the ideal cut for this recipe. These are the small, tender strips of meat that naturally separate from the underside of chicken breasts. They’re already the perfect size and shape, requiring no cutting or trimming.
If you can’t find packaged chicken tenderloins, regular boneless, skinless chicken breasts work perfectly. Simply slice them lengthwise into strips about 1 inch wide and 4-5 inches long. This creates uniform pieces that cook evenly in the same timeframe as natural tenderloins.
The key advantage of using chicken breast meat is its mild flavor and tender texture when cooked properly. Unlike chicken thighs, breasts have less fat and connective tissue, so they cook quickly without requiring long braising times to become tender.
Buying Tips for Quality Chicken
Look for chicken with a pink color and firm texture when pressed gently. Avoid any packages with excessive liquid pooling at the bottom, which indicates the chicken has been frozen and thawed or is past its prime freshness.
Check the sell-by date and choose packages with the furthest date available. Fresh chicken should have virtually no smell—any sour or unpleasant odor means the chicken has spoiled and should not be purchased.
For the best value, buy family packs of chicken breasts and cut your own tenders at home. This typically costs $1-2 less per pound than pre-cut tenderloins while giving you identical results. Freeze extras in portion-sized bags for future quick meals.
Chicken Substitutions and Alternatives
While chicken breast is traditional for Chicken Tenders, you can adapt this recipe:
- Chicken thighs: Cut boneless, skinless thighs into strips for juicier, more flavorful tenders with slightly higher fat content
- Turkey breast: Slice turkey breast into strips for a leaner alternative with nearly identical cooking times
- Pork tenderloin: Cut into strips for pork “tenders” that work beautifully with the same breading and cooking method
- Firm white fish: Use cod or halibut strips for fish tenders, reducing cooking time to 12-15 minutes total
Ingredients & Prep
Chicken Prep Essentials
Main Ingredients:
- 1.5 pounds chicken breast tenderloins (or 2 large chicken breasts, cut into strips)
- 1 cup all-purpose flour
- 2 large eggs
- 1 cup panko breadcrumbs
- 1/2 cup grated Parmesan cheese
- 1 teaspoon garlic powder
- 1 teaspoon paprika
- 1 teaspoon salt
- 1/2 teaspoon black pepper
- 1/4 cup vegetable or canola oil for frying
Optional Enhancement Ingredients:
- 1 teaspoon onion powder
- 1/2 teaspoon cayenne pepper for heat
- 1 tablespoon fresh parsley, chopped
- Lemon wedges for serving
Breading Station Setup
The secret to perfect Chicken Tenders is an efficient three-bowl breading station that keeps the process quick and mess-free. Set up three shallow bowls or pie plates in a row on your counter.
Bowl 1 – Flour mixture: Combine flour with half the salt, pepper, garlic powder, and paprika. This seasoned flour helps the egg adhere while adding flavor.
Bowl 2 – Egg wash: Whisk eggs with 2 tablespoons water until smooth. The water thins the eggs slightly for even coating.
Bowl 3 – Breadcrumb mixture: Mix panko breadcrumbs, Parmesan cheese, and remaining seasonings. The Parmesan adds savory depth and helps achieve golden color.
Quick Prep Timeline
Pat chicken tenderloins completely dry with paper towels—moisture prevents breading from sticking properly. Season chicken lightly with salt and pepper before breading for flavor throughout.
Set up your breading station while the pan preheats (3 minutes). Bread all chicken pieces before you start cooking (5 minutes). This assembly-line approach is more efficient than breading and cooking one piece at a time.
Have a plate lined with paper towels ready beside the stove for draining cooked Chicken Tenders. Keep the oil and a spatula within arm’s reach so everything flows smoothly once cooking begins.
Step-by-Step Cooking Instructions
Step 1: Prepare the Chicken
Remove chicken tenderloins from packaging and pat them thoroughly dry with paper towels. Any surface moisture will cause the breading to become soggy and slide off during cooking. If using chicken breasts, slice them lengthwise into strips approximately 1 inch wide.
Season the chicken lightly with salt and pepper on both sides. This base seasoning ensures the meat itself has flavor, not just the coating. Let the chicken sit at room temperature for 5 minutes while you set up the breading station—room-temperature chicken cooks more evenly than cold chicken straight from the refrigerator.
Step 2: Create the Breading Station
Set up three shallow bowls in a row. In the first bowl, combine 1 cup flour with 1/2 teaspoon each of garlic powder, paprika, salt, and black pepper. In the second bowl, whisk together 2 eggs and 2 tablespoons water until smooth. In the third bowl, mix 1 cup panko breadcrumbs, 1/2 cup grated Parmesan, and the remaining 1/2 teaspoon of each seasoning.
Line up the bowls in order: flour, egg, breadcrumbs. Place a clean plate at the end of the line for the breaded tenders.
Step 3: Bread the Chicken Tenders
Use one hand as your “dry hand” and the other as your “wet hand” to prevent buildup on your fingers. With your dry hand, place a chicken tender in the flour bowl and turn to coat completely. Shake off excess flour.
Transfer the tender to the egg wash. Use your wet hand to turn it, ensuring complete coverage. Let excess egg drip off for a moment. Move the tender to the breadcrumb mixture and use your dry hand again to press breadcrumbs firmly onto all surfaces. The pressing motion is crucial—gently pack the breadcrumbs so they adhere well.
Place breaded tenders on the clean plate without stacking them. Repeat until all chicken is breaded. This should take 4-5 minutes total.
Step 4: Heat the Oil
Pour 1/4 cup oil into a large skillet (12 inches works best) and heat over medium-high heat for 2-3 minutes. The oil should shimmer and move fluidly when you tilt the pan. Test readiness by dropping a pinch of breadcrumbs into the oil—they should sizzle immediately and turn golden within 30 seconds.
Proper oil temperature is critical for Chicken Tenders. Too cool and they’ll absorb oil and become greasy; too hot and the coating burns before the chicken cooks through. Medium-high heat typically produces the ideal 350-375°F temperature.
Step 5: Cook the Chicken Tenders
Carefully place breaded chicken tenders in the hot oil without overcrowding—leave at least 1/2 inch between pieces. Cook 3-4 tenders at a time depending on pan size. Overcrowding drops the oil temperature and produces soggy, unevenly cooked results.
Cook for 3-4 minutes on the first side without moving them. You’ll see the edges turn golden brown and the coating set. Flip gently using tongs or a spatula and cook for another 3-4 minutes on the second side until deep golden brown and crispy.
The internal temperature should reach 165°F for food safety. Insert an instant-read thermometer into the thickest part of a tender to check—it should slide in easily with no resistance, indicating the chicken is cooked through.
Step 6: Drain and Serve
Transfer cooked Chicken Tenders to the paper towel-lined plate to drain excess oil. Let them rest for 2-3 minutes, which allows the coating to set and ensures the juices redistribute throughout the meat for maximum tenderness.
Serve immediately while hot and crispy. The total cooking time for all tenders is 10-12 minutes if you work in two batches, keeping your total recipe time right at 20 minutes from start to finish.
Pro Tips for Perfect Chicken Tenders
Avoiding Dry or Tough Chicken
Problem: Dry, overcooked chicken happens when you cook at too high heat or for too long. Chicken breast becomes dry above 165°F, so remove tenders from heat the moment they reach temperature. Carryover cooking will bring them to perfect doneness as they rest.
Problem: Undercooked centers with burnt coating results from oil that’s too hot. If you see the coating browning in under 2 minutes per side, reduce heat to medium. The coating should take 3-4 minutes to reach golden brown, giving the interior time to cook through.
Problem: Breading falls off during cooking occurs when chicken is too wet or you didn’t press the breadcrumbs firmly enough. Always pat chicken completely dry, and press breadcrumbs into the surface with gentle pressure to create adhesion.
Essential Tool Recommendations
A large cast-iron or stainless steel skillet provides even heat distribution and maintains consistent temperature when you add chicken. The 12-inch size allows you to cook more tenders per batch, speeding up the process.
An instant-read meat thermometer eliminates guesswork and ensures perfect doneness every time. Digital models read temperature in 2-3 seconds, which is essential when working with thin pieces like Chicken Tenders.
Long-handled tongs keep your hands safe from hot oil while providing control for flipping tenders. Choose tongs with silicone tips to prevent scratching non-stick pans if you use them.
A wire cooling rack set over a baking sheet is superior to paper towels for keeping tenders crispy. If making multiple batches, place cooked tenders on the rack in a 200°F oven to keep warm without steaming.
Storage and Reheating Guidelines
Store leftover Chicken Tenders in an airtight container in the refrigerator for up to 4 days. Don’t stack them while hot, as trapped steam makes the coating soggy. Let them cool completely before storing.
To reheat and restore crispiness, place tenders on a baking sheet and heat in a 375°F oven for 8-10 minutes until hot and crispy. Avoid microwaving, which makes the coating rubbery and soft.
For freezing, place cooled tenders on a baking sheet in a single layer and freeze until solid (about 2 hours). Transfer frozen tenders to a freezer bag and store for up to 3 months. Reheat from frozen in a 400°F oven for 15-18 minutes.
Flavor Variations
Classic Seasoning Combinations
Transform your Chicken Tenders with these delicious variations:
Southern Buttermilk Style: Replace the egg wash with 1 cup buttermilk mixed with 1 teaspoon hot sauce. Marinate chicken in the mixture for 15 minutes before breading. Add 1/2 teaspoon cayenne to the flour mixture for authentic Southern heat.
Italian Herb: Add 1 tablespoon Italian seasoning and 1 teaspoon dried basil to the breadcrumb mixture. Use Italian-seasoned panko if available for extra herb flavor.
Ranch-Seasoned: Mix 2 tablespoons dry ranch seasoning mix into the breadcrumb mixture for tangy, herb-packed tenders that taste like they’ve been marinated.
Spicy Variations
Buffalo-Style: Add 1 tablespoon cayenne pepper to the flour mixture and toss cooked tenders in buffalo sauce immediately after frying. Serve with blue cheese dressing and celery sticks.
Nashville Hot: Create a spicy oil by mixing 2 tablespoons of the cooking oil with 1 tablespoon cayenne pepper, 1 teaspoon brown sugar, and 1/2 teaspoon paprika. Brush this mixture on hot tenders right after cooking.
Cajun-Spiced: Replace the standard seasonings with 2 tablespoons Cajun or Creole seasoning in the breadcrumb mixture for bold Louisiana flavor.
Diet-Friendly Adaptations
Gluten-Free Chicken Tenders: Use gluten-free flour blend and gluten-free panko breadcrumbs or crushed gluten-free cornflakes. The cooking method remains identical with equally crispy results.
Low-Carb/Keto: Replace flour with almond flour and breadcrumbs with crushed pork rinds mixed with Parmesan cheese. This creates a zero-carb coating that’s incredibly crispy and flavorful.
Baked Version: For lower-fat tenders, place breaded chicken on a greased baking sheet, spray tops with cooking spray, and bake at 425°F for 15-18 minutes, flipping halfway through. They won’t be quite as crispy as fried but still delicious.
Global Flavor Inspirations
Asian-Inspired: Add 1 teaspoon ground ginger and 1/2 teaspoon five-spice powder to the breading. Serve with sweet chili sauce or teriyaki glaze for dipping.
Mediterranean: Mix 1 tablespoon za’atar seasoning into the breadcrumb mixture and serve with tzatziki sauce and lemon wedges.
Mexican Street-Style: Add 1 tablespoon chili powder and 1 teaspoon cumin to the breading. Serve with lime wedges, hot sauce, and cilantro-lime crema.
Serving Suggestions
Perfect Side Dish Pairings
Serve your Chicken Tenders with classic French fries or crispy sweet potato fries for the ultimate comfort food combination. The contrasting textures and complementary flavors create a satisfying meal.
For a healthier plate, pair with a fresh garden salad with ranch dressing, steamed broccoli with lemon butter, or roasted vegetables. The light sides balance the richness of the fried chicken.
Create a complete dinner with creamy coleslaw, corn on the cob, and baked beans for a Southern-inspired feast. Mac and cheese makes an indulgent side that kids especially love alongside Chicken Tenders.
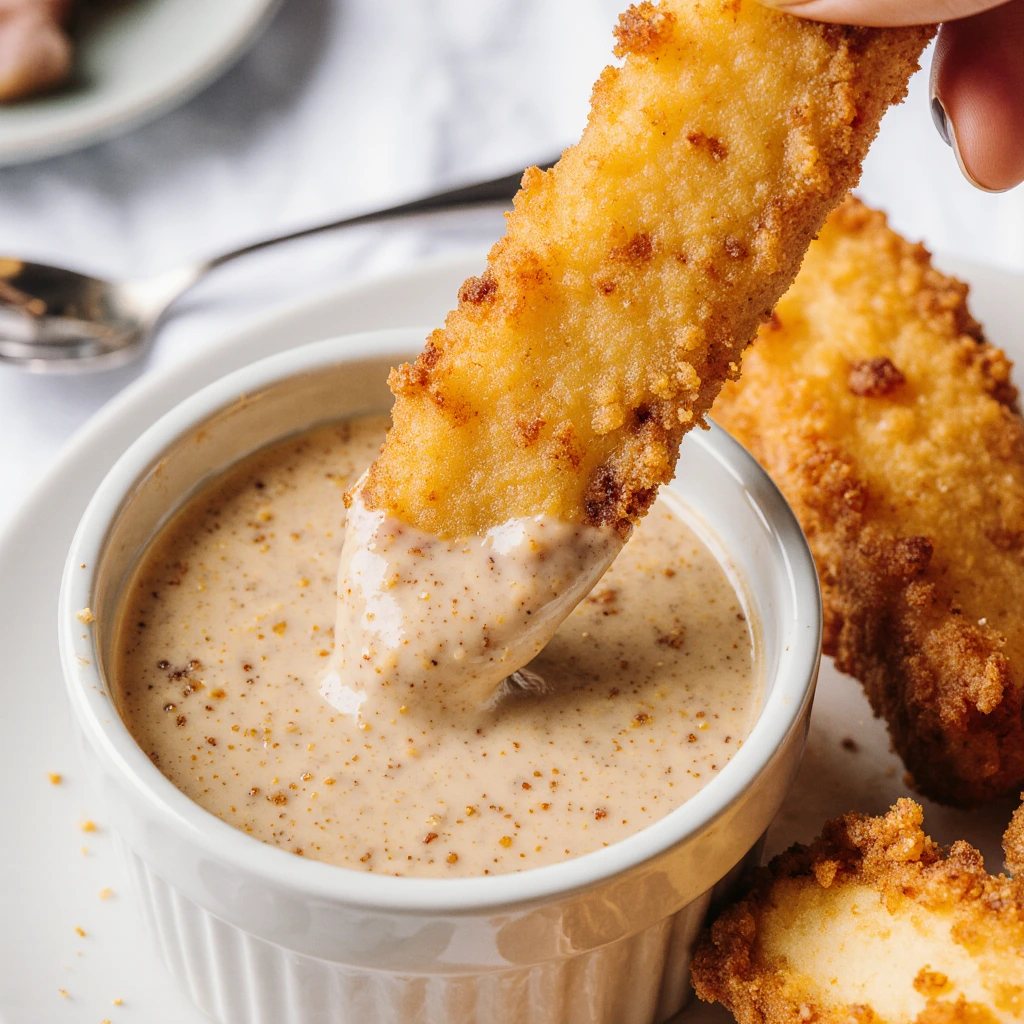
Dipping Sauce Options
Classic choices: Honey mustard, barbecue sauce, ranch dressing, and ketchup are family favorites that please most palates. Set out 3-4 options for variety.
Elevated sauces: Try chipotle mayo (mix mayo with adobo sauce), sriracha aioli (mayo with sriracha and lime), or garlic Parmesan sauce (melted butter with garlic and Parmesan) for adult gatherings.
International flavors: Serve with sweet chili sauce, tzatziki, honey sriracha, or comeback sauce (a Southern specialty combining mayo, ketchup, hot sauce, and spices).
Creative Serving Ideas
Chicken Tender Sliders: Place a tender on a small bun with lettuce, tomato, and your favorite sauce for mini sandwiches perfect for parties.
Salad Toppers: Slice cooled tenders and place on Caesar salad, Cobb salad, or mixed greens for a protein-packed meal.
Wrap or Bowl: Dice tenders and use in wraps, grain bowls, or buddha bowls with rice, vegetables, and sauce.
Beverage Pairings
For family dinners: Lemonade, iced tea, or cold milk complement the savory, crispy chicken perfectly and cleanse the palate between bites.
For adult gatherings: Light lager beer, crisp white wine like Sauvignon Blanc, or a refreshing wheat beer pair wonderfully with fried Chicken Tenders.
Non-alcoholic options: Sparkling water with lemon, fruit-infused water, or homemade fruit punch provide refreshing contrast to the rich, fried coating.
Frequently Asked Questions
Can I use frozen chicken for Chicken Tenders?
Frozen chicken tenderloins can work but require thawing first. Never bread or cook frozen chicken—it won’t cook evenly and the coating won’t adhere properly. Thaw chicken overnight in the refrigerator or use the cold water method (sealed in a bag, submerged in cold water for 1-2 hours). Pat thawed chicken very dry before proceeding with the recipe.
How do I know when Chicken Tenders are fully cooked?
The only reliable method is checking internal temperature with an instant-read thermometer. Insert it into the thickest part of a tender—it should read 165°F. Visual cues include golden-brown coating, white (not pink) meat throughout, and clear juices when pierced. When in doubt, cut one tender open to check for any pink areas.
Why did my breading get soggy?
Soggy breading usually results from wet chicken, oil temperature that’s too low, or stacking hot tenders immediately after cooking. Always pat chicken completely dry, maintain proper oil temperature (test with breadcrumbs—they should sizzle immediately), and let cooked tenders drain on paper towels or a wire rack without stacking.
Can I make Chicken Tenders ahead of time?
You can bread chicken up to 4 hours ahead and refrigerate until ready to cook—this actually helps the coating adhere better. However, cook them just before serving for best texture. Fully cooked tenders can be made 1-2 days ahead and reheated in the oven at 375°F for 8-10 minutes to restore crispiness.
What’s the best oil for frying Chicken Tenders?
Vegetable oil, canola oil, or peanut oil work best due to their neutral flavor and high smoke points. Avoid olive oil (smoke point too low) or butter (burns easily). You need an oil that can maintain 350-375°F without smoking or breaking down.
How do I prevent oil splatter when cooking?
Pat chicken completely dry before breading—moisture causes splatter. Don’t drop chicken into oil from a height; instead, use tongs to gently lay it in the pan starting with the edge closest to you. A splatter screen placed over the pan catches oil droplets while allowing steam to escape.
Are Chicken Tenders safe during pregnancy?
Yes, when cooked to 165°F internal temperature, Chicken Tenders are completely safe during pregnancy. Use a thermometer to verify doneness rather than relying on visual cues alone. Avoid rare or undercooked chicken at all times.
Can I bake these instead of frying?
Absolutely! Place breaded tenders on a greased or parchment-lined baking sheet, spray tops generously with cooking spray, and bake at 425°F for 15-18 minutes, flipping halfway through. They won’t be quite as crispy as pan-fried but are still delicious and contain significantly less oil.
What if I don’t have panko breadcrumbs?
Regular breadcrumbs work but produce a finer, less crispy coating. For better results, crush cornflakes, crackers, or even pretzels for unique texture and flavor. Crushed cornflakes create an exceptionally crispy coating that many people prefer over panko.
Conclusion
You now have everything you need to create restaurant-quality Chicken Tenders in just 20 minutes, right in your own kitchen. This recipe eliminates the guesswork with clear instructions, proper techniques, and professional tips that guarantee crispy, juicy results every single time.
Don’t let another busy weeknight push you toward expensive takeout or bland frozen dinners. Heat up that skillet tonight and experience how easy it is to make incredible Chicken Tenders that your entire family will devour. The 20-minute timeline isn’t an exaggeration—it’s a tested, reliable promise.
Join over 15,000 home cooks who’ve made this their go-to chicken recipe and shared photos of their golden, crispy results. Drop a comment below and tell me what dipping sauce you tried or what variations you created—I love hearing how you make this recipe your own!
Ready to expand your quick dinner repertoire? Try our 25-Minute Honey Garlic Chicken Thighs or explore our Complete Guide to Crispy Oven-Baked Chicken Wings for more crowd-pleasing poultry recipes that fit your busy schedule!