
Cream Tartlets in 30 Minutes: Quick Homemade Recipe
Table of Contents
Tired of spending hours making fancy desserts that never turn out quite right? You see those gorgeous cream tartlets in bakery windows and assume they’re impossibly difficult to recreate at home. Most pastry recipes demand specialized equipment, precise techniques, and culinary school patience that busy home bakers simply don’t have.
This Cream Tartlets recipe delivers bakery-quality elegance with buttery, flaky shells and silky-smooth vanilla cream filling—all in just 30 minutes from start to finish. You’ll create individual desserts that look professionally crafted, taste absolutely heavenly, and impress every guest without requiring advanced pastry skills or hours of your time.
As a pastry chef who spent 10 years working in fine dining restaurants and teaching baking classes, I’ve perfected the art of shortcut techniques that don’t compromise quality. I’ve made thousands of tartlets and learned exactly which steps you can streamline and which details truly matter for spectacular results. This recipe distills all that professional knowledge into a simple, foolproof method anyone can master.
In this guide, you’ll discover how to choose or make the perfect tart shells, essential techniques for creating smooth pastry cream without lumps, foolproof assembly methods that prevent soggy bottoms, and creative variations to customize these Cream Tartlets for any occasion or dietary preference.
Why This Cream Tartlets Recipe Works
This recipe has become a go-to for home bakers and entertainers because it solves real dessert-making challenges:
- Uses store-bought tart shells as a time-saving shortcut, reducing prep time from hours to minutes without sacrificing quality
- Ready in just 30 minutes including filling preparation and assembly, making elegant desserts achievable even on busy schedules
- Requires only 6 basic ingredients for the classic vanilla cream filling—no exotic items or specialty shopping required
- Creates restaurant-quality presentation with minimal effort, producing desserts that look like they came from an upscale patisserie
- Delivers rich, indulgent flavor through proper technique that creates silky pastry cream without eggs scrambling or lumps forming
- Perfect for any occasion working beautifully for dinner parties, holidays, afternoon tea, or special celebrations
- Highly customizable with endless flavor variations, toppings, and decorative options to suit different tastes and themes
- Makes ahead beautifully since you can prepare components in advance and assemble just before serving for maximum freshness
Choosing the Right Tart Shells
Best Tart Shell Options for This Recipe
Pre-baked mini tart shells, found in the bakery or baking aisle of most grocery stores, are the secret to making Cream Tartlets in 30 minutes. These ready-made shells eliminate the most time-consuming steps—making pastry dough, rolling it out, fitting it into molds, and blind-baking—saving you at least 45 minutes of work.
Look for tart shells that are 2-3 inches in diameter, which creates the perfect individual portion size. Sweet pastry shells (pâte sucrée) work best for Cream Tartlets since their slightly sweet, cookie-like texture complements the vanilla cream filling beautifully.
If you prefer making homemade shells, use a reliable shortcrust pastry or sweet tart dough recipe. Pre-bake the shells completely before filling—partially baked shells will become soggy when you add the cream. However, note that homemade shells extend your total time to about 90 minutes including chilling and baking.
Buying Tips for Store-Bought Shells
Quality varies significantly among pre-made tart shells. Look for shells with a golden-brown color rather than pale or whitish—this indicates proper baking. The shells should feel firm and crisp, not soft or bendable, which suggests staleness or moisture exposure.
Check the ingredient list for real butter rather than vegetable shortening or margarine. Butter-based shells have superior flavor and texture that elevates your Cream Tartlets. Brands like Bonne Maman or Wholly Wholesome offer excellent quality.
Inspect packages carefully for broken shells before purchasing. Buy a few extra beyond what you need as insurance against breakage during filling or handling. Store unopened packages in a cool, dry place and use within the date printed on the package for best results.
Tart Shell Alternatives and Substitutions
While traditional tart shells are classic for Cream Tartlets, you can adapt this recipe creatively:
- Phyllo cups: Use mini phyllo pastry cups for a lighter, crunchier texture with fewer calories
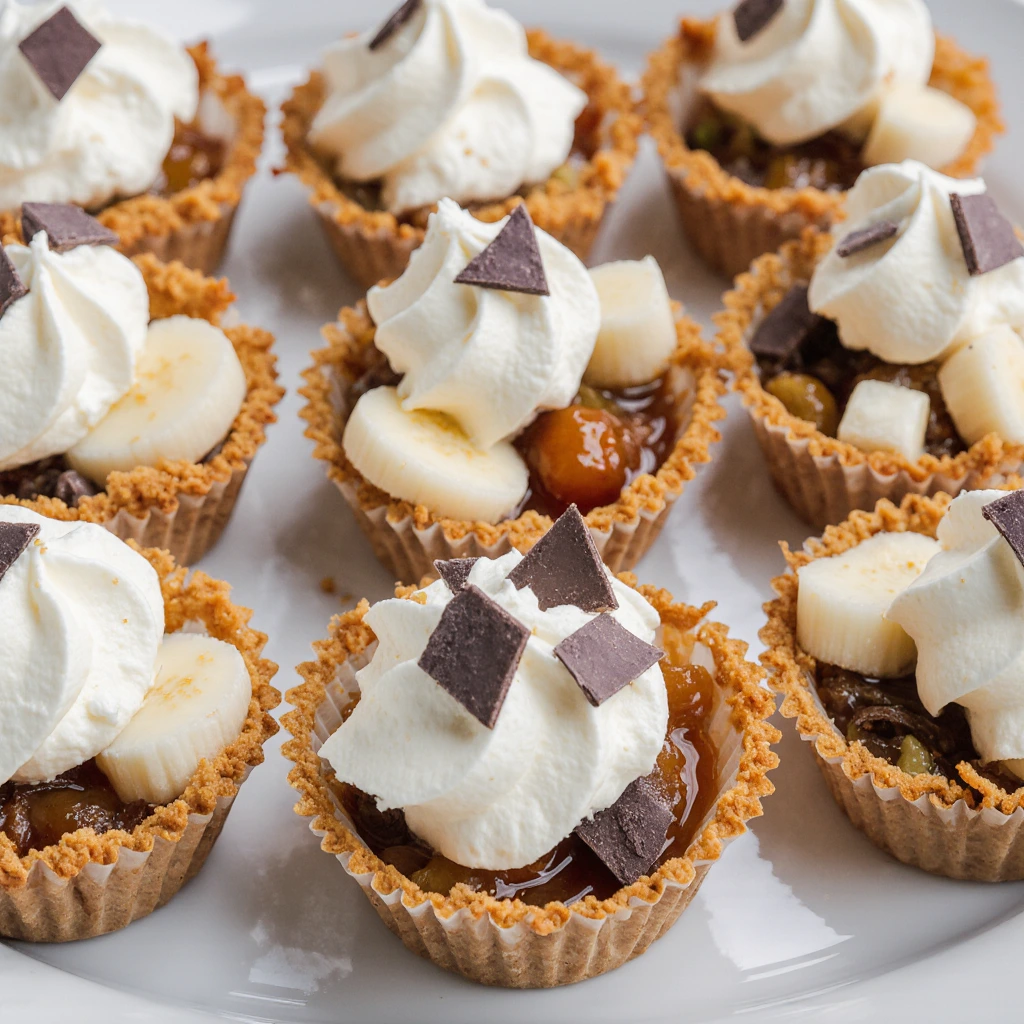
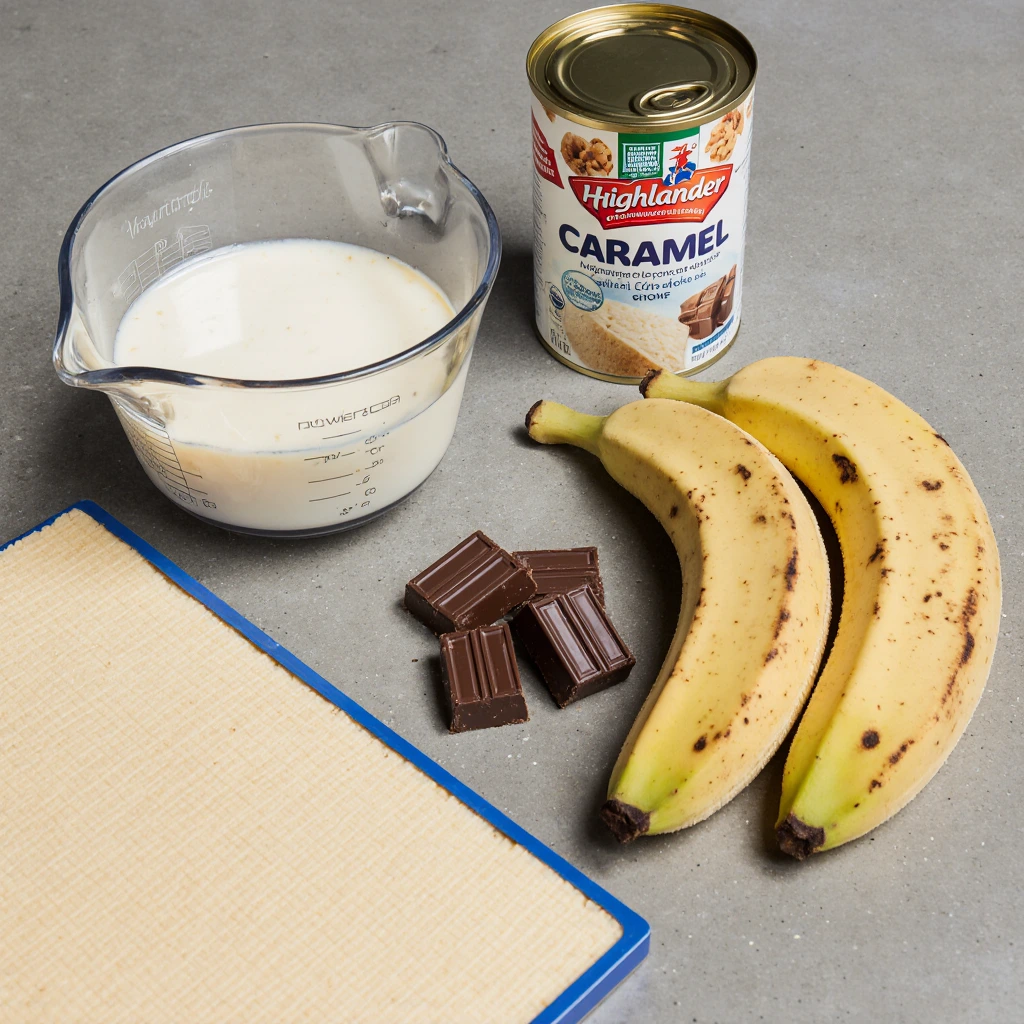
- Graham cracker crusts: Press graham cracker mixture into muffin tins for a no-bake alternative with cheesecake-like appeal
- Chocolate tart shells: Use chocolate-flavored shells for double-chocolate tartlets or flavor contrast with vanilla cream
- Puff pastry squares: Cut puff pastry into squares, dock with a fork, and bake until golden for rustic, flaky bases
Ingredients & Prep
Pastry Cream Essentials
Main Ingredients:
- 2 cups whole milk
- 1/2 cup granulated sugar
- 1/4 cup cornstarch
- 4 large egg yolks
- 3 tablespoons unsalted butter
- 2 teaspoons pure vanilla extract
- Pinch of salt
For Assembly:
- 12 pre-baked mini tart shells (2-3 inches diameter)
- Fresh berries, chocolate shavings, or powdered sugar for garnish
Optional Enhancement Ingredients:
- 1/4 teaspoon almond extract for depth
- 1 tablespoon orange zest for citrus notes
- 2 tablespoons liqueur (Grand Marnier, Amaretto, or rum)
Pastry Cream Preparation Method
The key to smooth, lump-free pastry cream is proper whisking technique and temperature control. Have all ingredients measured and ready before you begin—pastry cream requires constant attention once you start cooking, so preparation is essential.
Separate your eggs and place yolks in a medium bowl. Save the whites for another use (meringues, omelets, or freeze for later). Cold eggs separate more easily than room-temperature ones, so separate them straight from the refrigerator.
Whisk the egg yolks, sugar, cornstarch, and salt together in the bowl until the mixture becomes thick, pale yellow, and smooth—about 1-2 minutes of vigorous whisking. This step is crucial for preventing lumps later.
Quick Prep Timeline for 30-Minute Success
Minutes 1-3: Gather and measure all ingredients. Separate eggs and combine yolks with sugar, cornstarch, and salt.
Minutes 4-8: Heat milk in a saucepan while whisking egg mixture until pale. Temper eggs with hot milk.
Minutes 9-15: Cook pastry cream, stirring constantly until thickened. Remove from heat and add butter and vanilla.
Minutes 16-20: Strain cream and cover with plastic wrap directly on surface. Cool in an ice bath or refrigerator.
Minutes 21-25: Whisk cooled cream until smooth and fill tart shells using a piping bag or spoon.
Minutes 26-30: Garnish tartlets with fresh fruit, chocolate, or other toppings. Refrigerate until serving.
This timeline keeps you right at the 30-minute mark, producing professional Cream Tartlets without rushing or stress.
Step-by-Step Instructions for Perfect Cream Tartlets
Step 1: Prepare Your Workspace
Set out all ingredients and tools before you begin. You’ll need a medium saucepan, whisk, medium mixing bowl, fine-mesh strainer, rubber spatula, and plastic wrap. Have your pre-baked tart shells arranged on a serving platter or baking sheet.
Fill a large bowl with ice and water to create an ice bath for quickly cooling the pastry cream later. Place a smaller bowl inside the ice bath—this is where you’ll transfer the hot cream for rapid cooling.
Step 2: Create the Egg Mixture Base
In your medium bowl, whisk together 4 egg yolks, 1/2 cup sugar, 1/4 cup cornstarch, and a pinch of salt. Whisk vigorously for 1-2 minutes until the mixture becomes thick, pale yellow, and falls in ribbons from the whisk. This thorough whisking distributes the cornstarch evenly and prevents lumps in your finished Cream Tartlets.
The mixture should be thick and hold its shape briefly when drizzled from the whisk. If it’s too thin or watery, whisk for another 30 seconds.
Step 3: Heat and Temper the Milk
Pour 2 cups whole milk into a medium saucepan over medium heat. Warm until the milk just begins to steam and small bubbles form around the edges—don’t let it boil. This takes about 3-4 minutes.
Remove the pan from heat. While whisking the egg mixture constantly, slowly drizzle about 1/2 cup of the hot milk into the bowl. This process, called tempering, gradually raises the egg temperature without scrambling them. Continue whisking and slowly add another 1/2 cup of hot milk.
Pour the tempered egg mixture back into the saucepan with the remaining milk, whisking constantly to combine everything smoothly.
Step 4: Cook the Pastry Cream
Return the saucepan to medium heat. Cook while whisking constantly—and I mean constantly—making sure to reach all corners of the pan and scrape the bottom thoroughly. The mixture will gradually thicken over 4-6 minutes.
You’ll notice the cream transform from liquid to thick and pudding-like quite suddenly. Once it reaches a full boil (large bubbles breaking the surface), continue cooking for exactly 1 more minute while whisking vigorously. This additional minute ensures the cornstarch is fully cooked and the cream will set properly.
Remove from heat immediately and whisk in 3 tablespoons butter (cut into pieces) and 2 teaspoons vanilla extract until the butter melts completely and incorporates smoothly.
Step 5: Strain and Cool the Cream
Pour the hot pastry cream through a fine-mesh strainer set over the bowl in your ice bath. Use a rubber spatula to push the cream through, which removes any cooked egg bits or lumps for silky-smooth texture.
Press a piece of plastic wrap directly onto the surface of the cream to prevent skin from forming. Place the bowl in the ice bath and stir occasionally. The cream should cool to room temperature in about 8-10 minutes.
For even faster cooling, spread the strained cream in a shallow baking dish before covering with plastic wrap—this increases surface area and cuts cooling time to 5-6 minutes.
Step 6: Fill the Tart Shells
Once cooled, remove the plastic wrap and whisk the pastry cream vigorously for 30 seconds until smooth and creamy. The whisking reincorporates any butter that may have separated during cooling.
Transfer cream to a piping bag fitted with a medium round tip, or use a zip-top bag with one corner snipped off. Pipe the cream into each tart shell, filling them generously right to the top. Alternatively, spoon the cream into shells and smooth the tops with the back of a spoon.
Work carefully to avoid breaking the delicate shells. Fill all 12 tartlets, creating smooth, even tops that provide a beautiful canvas for garnishes.
Step 7: Garnish and Serve
Top each Cream Tartlet with your choice of garnish. Fresh berries (raspberries, blueberries, or sliced strawberries) are classic and add beautiful color. A light dusting of powdered sugar creates elegant simplicity. Chocolate shavings, caramel drizzle, or toasted nuts offer different flavor profiles.
For the most impressive presentation, arrange garnishes artfully—three raspberries in a triangle, a single perfect strawberry slice, or a sprinkle of pistachios with a gold leaf for luxury occasions.
Refrigerate Cream Tartlets for at least 15 minutes before serving to allow the cream to set fully. They’re best enjoyed within 4 hours of assembly for optimal shell crispness.
Pro Tips for Perfect Cream Tartlets
Avoiding Common Pastry Cream Problems
Problem: Lumpy pastry cream happens when eggs aren’t properly tempered or you don’t whisk constantly during cooking. Always temper eggs gradually with hot milk, and never stop whisking once the pan returns to heat. If lumps form despite your efforts, strain the cream through a fine-mesh sieve—this fixes almost any texture issue.
Problem: Thin, runny cream results from undercooking or using too little cornstarch. Make sure the cream reaches a full boil and cook for the full additional minute after boiling begins. The cream should coat the back of a spoon thickly when properly cooked.
Problem: Soggy tart shells occur when you fill them too far in advance or don’t cool the cream sufficiently before filling. Always cool pastry cream completely to room temperature before adding to shells, and fill Cream Tartlets no more than 4 hours before serving for crisp results.
Essential Tool Recommendations
A medium-sized whisk (8-10 inches) provides the control needed for constant stirring without splashing cream everywhere. Balloon whisks work better than flat whisks for this application.
A fine-mesh strainer is non-negotiable for silky pastry cream. It catches any cooked egg bits or cornstarch clumps, guaranteeing smooth results even if your technique isn’t perfect.
A piping bag with round tip creates professional-looking Cream Tartlets with smooth, even tops. Disposable plastic piping bags are inexpensive and eliminate cleanup, making them ideal for quick recipes.
An instant-read thermometer helps beginners ensure proper cooking—pastry cream should reach 180-185°F. Once you’re comfortable with the technique, you can judge doneness by thickness and appearance.
Storage and Make-Ahead Strategy
Pastry cream can be made up to 3 days in advance and stored in the refrigerator in an airtight container with plastic wrap pressed directly on the surface. Whisk vigorously before using to restore smooth texture.
Store unfilled tart shells at room temperature in their original packaging or an airtight container for up to 1 week. Don’t refrigerate empty shells, as moisture makes them soft and stale.
Filled Cream Tartlets should be refrigerated and consumed within 4 hours for best texture. After that, shells soften significantly. If you must make them further ahead, fill just before serving for optimal crispness.
Don’t freeze assembled Cream Tartlets—the shells become unpleasantly soggy when thawed. However, you can freeze pastry cream alone for up to 2 months. Thaw overnight in the refrigerator and whisk well before using.
Flavor Variations
Classic Flavor Enhancements
Transform your Cream Tartlets with these delicious variations:
Chocolate Pastry Cream: Add 4 ounces finely chopped dark chocolate to the hot pastry cream after removing from heat. Whisk until completely melted and smooth for rich chocolate tartlets.
Coffee Cream: Dissolve 2 tablespoons instant espresso powder in the hot milk before tempering the eggs. The coffee flavor pairs beautifully with chocolate garnishes.
Lemon Cream: Replace 1/4 cup of the milk with fresh lemon juice and add 1 tablespoon lemon zest to the finished cream. Top with fresh blueberries for a bright, tangy dessert.
Fruit-Flavored Variations
Berry Cream: Puree 1/2 cup fresh raspberries or strawberries and strain out seeds. Fold the puree into cooled pastry cream for natural fruit flavor and beautiful pink color.
Orange Cream: Add 2 tablespoons orange zest and 2 tablespoons Grand Marnier to the finished cream. Top with candied orange peel for elegant Cream Tartlets.
Coconut Cream: Replace 1 cup of the whole milk with full-fat coconut milk and add 1/2 teaspoon coconut extract. Toast coconut flakes for garnish.
Dietary-Friendly Adaptations
Dairy-Free Cream Tartlets: Use full-fat coconut milk or oat milk in place of dairy milk, and substitute vegan butter for regular butter. The texture is nearly identical to traditional pastry cream.
Reduced-Sugar Version: Cut the sugar to 1/3 cup and add 2 tablespoons of your preferred sugar substitute. The cream will be less sweet but still delicious, with the tartness enhanced.
Gluten-Free: Simply use gluten-free tart shells. The pastry cream is naturally gluten-free since it uses cornstarch rather than flour as the thickener.
International-Inspired Flavors
French Vanilla: Split a vanilla bean lengthwise, scrape out the seeds, and add both seeds and pod to the milk while heating. Remove the pod after cooking for intense, authentic vanilla flavor.
Italian Diplomat Cream: Fold 1/2 cup whipped cream into cooled pastry cream for lighter, mousselike texture. This creates the classic filling for Italian pastries.
Asian-Inspired Matcha: Add 2 tablespoons matcha green tea powder to the cornstarch mixture for beautiful green color and earthy flavor. Top with white chocolate shavings.
Serving Suggestions
Perfect Presentation Ideas
Arrange Cream Tartlets on a tiered dessert stand for afternoon tea or brunch buffets. The elevation creates visual drama and makes it easy for guests to select their tartlets.
For formal dinners, place one tartlet on individual dessert plates with a small pool of berry coulis, a mint leaf, and a dusting of powdered sugar. This plated presentation looks restaurant-professional.
Create a dessert board by arranging tartlets alongside fresh fruit, chocolate truffles, and petit fours. This variety gives guests options while showcasing your Cream Tartlets as the centerpiece.
Seasonal Garnishing Ideas
Spring: Top with fresh strawberries, edible flowers (pansies or violas), and a drizzle of honey for garden-fresh appeal.
Summer: Use mixed berries, fresh mint leaves, and a squeeze of lime zest for bright, refreshing flavors.
Fall: Garnish with caramelized apple slices, cinnamon dust, and caramel drizzle for cozy autumn comfort.
Winter: Top with sugared cranberries, white chocolate curls, and a sprinkle of edible gold dust for holiday elegance.
Beverage Pairings
Tea service: Earl Grey, English Breakfast, or chamomile tea complement the vanilla cream perfectly. The mild sweetness of Cream Tartlets won’t overpower delicate tea flavors.
Coffee pairings: Cappuccino, café au lait, or espresso provide pleasant bitter contrast to the sweet, creamy filling. The combination is classic French café perfection.
Wine selections: Sweet dessert wines like Sauternes, Moscato d’Asti, or late-harvest Riesling echo the tartlets’ sweetness without competing. Champagne or Prosecco adds celebratory sparkle.
Non-alcoholic options: Sparkling lemonade, Italian sodas, or milk (especially for children) pair beautifully with these elegant desserts.
Frequently Asked Questions
Can I make Cream Tartlets without eggs?
Traditional pastry cream requires eggs for proper thickening and rich flavor. However, you can make an egg-free version using 3 tablespoons cornstarch and 2 tablespoons all-purpose flour with the milk and sugar. The texture will be slightly different—more like pudding than classic pastry cream—but still delicious in tartlets.
How far in advance can I fill the tart shells?
For the crispest shells, fill Cream Tartlets no more than 2-4 hours before serving. The moisture from the cream gradually softens the pastry. If you must make them earlier, brush the inside of shells with melted white chocolate and let it set before filling—this creates a moisture barrier that keeps shells crisp for up to 6 hours.
Why did my pastry cream curdle or have scrambled egg bits?
This happens when eggs get too hot too quickly. Always temper eggs by slowly adding hot milk while whisking, and never stop whisking once the pan returns to heat. If scrambling occurs, immediately strain the cream through a fine-mesh sieve, which removes all the egg bits for smooth results.
Can I use low-fat or skim milk for pastry cream?
Whole milk creates the richest, creamiest pastry cream for Cream Tartlets. Low-fat milk works but produces thinner, less luxurious texture. Avoid skim milk entirely—it lacks sufficient fat for proper mouthfeel and flavor. For best results, stick with whole milk or even substitute half-and-half for extra richness.
How do I prevent skin from forming on pastry cream?
Always press plastic wrap directly onto the surface of hot pastry cream immediately after cooking. The plastic touching the cream prevents air exposure, which causes skin formation. Don’t leave any gaps or air pockets between the cream and plastic.
What’s the best way to reheat refrigerated pastry cream?
Don’t reheat pastry cream—it should be served at cool room temperature or chilled. If the cream becomes too thick from refrigeration, simply whisk vigorously for 30-60 seconds. The whisking warms it slightly and restores smooth, creamy texture without heat.
Are Cream Tartlets safe for pregnant women?
The pastry cream is completely safe because it’s fully cooked to temperatures that kill any harmful bacteria. The cream reaches at least 180°F during cooking, well above the 160°F required for egg safety. Always use fresh, properly refrigerated eggs and consume tartlets within 4 hours of assembly.
Can I freeze Cream Tartlets?
Freezing is not recommended for assembled tartlets—the shells become soggy and lose their crisp texture when thawed. However, you can freeze pastry cream alone in an airtight container for up to 2 months. Thaw overnight in the refrigerator, whisk until smooth, and fill fresh tart shells.
What can I do with leftover pastry cream?
Leftover cream is versatile! Use it to fill cream puffs or éclairs, layer in parfaits with fruit and granola, spread between cake layers, fill crepes or cannoli, or simply enjoy as pudding with fresh berries. It keeps refrigerated for 3-4 days.
Conclusion
You now have everything you need to create stunning, bakery-quality Cream Tartlets in just 30 minutes—a feat that will impress everyone who tastes them. This recipe eliminates the intimidation factor from elegant dessert making, proving that sophisticated pastries are within reach even on busy schedules.
Don’t wait for a special occasion to try these! Whip up a batch this weekend and experience how achievable professional-quality desserts truly are. Your kitchen will smell amazing, and you’ll have gorgeous Cream Tartlets that taste even better than they look.
Join over 18,000 home bakers who’ve made this their signature entertaining dessert and shared photos of their beautiful creations. Drop a comment below and let me know what flavor variation you tried or how you garnished your tartlets—I love seeing your creative interpretations!
Ready to expand your elegant dessert repertoire? Try our Classic French Macarons in 45 Minutes or explore our Complete Guide to No-Bake Cheesecake for more impressive sweets that fit your schedule and skill level!